 Samuel Allen
CS2 Utility Secrets: 5 Must-Know Nades For Dust2
Perhaps the most popular FPS map of all time, and one of the longest-standing maps in the history of the Counter-Strike franchise, Dust2 has been home to countless memories, matches, and moments in its time. Almost certainly, most of you reading this will have many fond memories of this map, and will feel at home on its angles whenever you load up. Today, in our latest Utility Secrets article, we are going to take a dive into a few of the most important pieces of utility on Dust II, explaining why they’re useful, and how to throw them.
Xbox Smoke
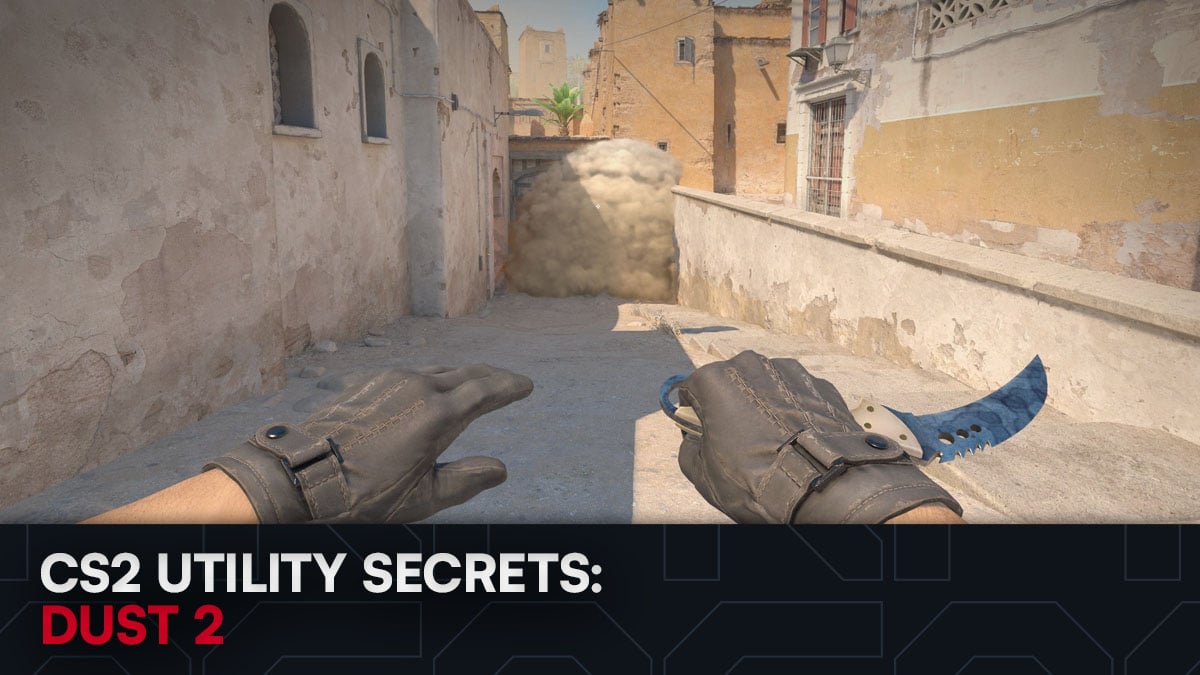
One of the most useful smokes on the entirety of de_dust2, the Xbox smoke is important for a number of reasons. If thrown at the start of the round, it denies a popular AWP line, removes a lot of important information from CTs playing Bottom Mid, and allows a variety of default setups and pocket strats in the middle of the map. It’s also one of the easiest pieces of utility to throw in the game. Let’s take a look.
First, you’ll want to get stuck into this corner: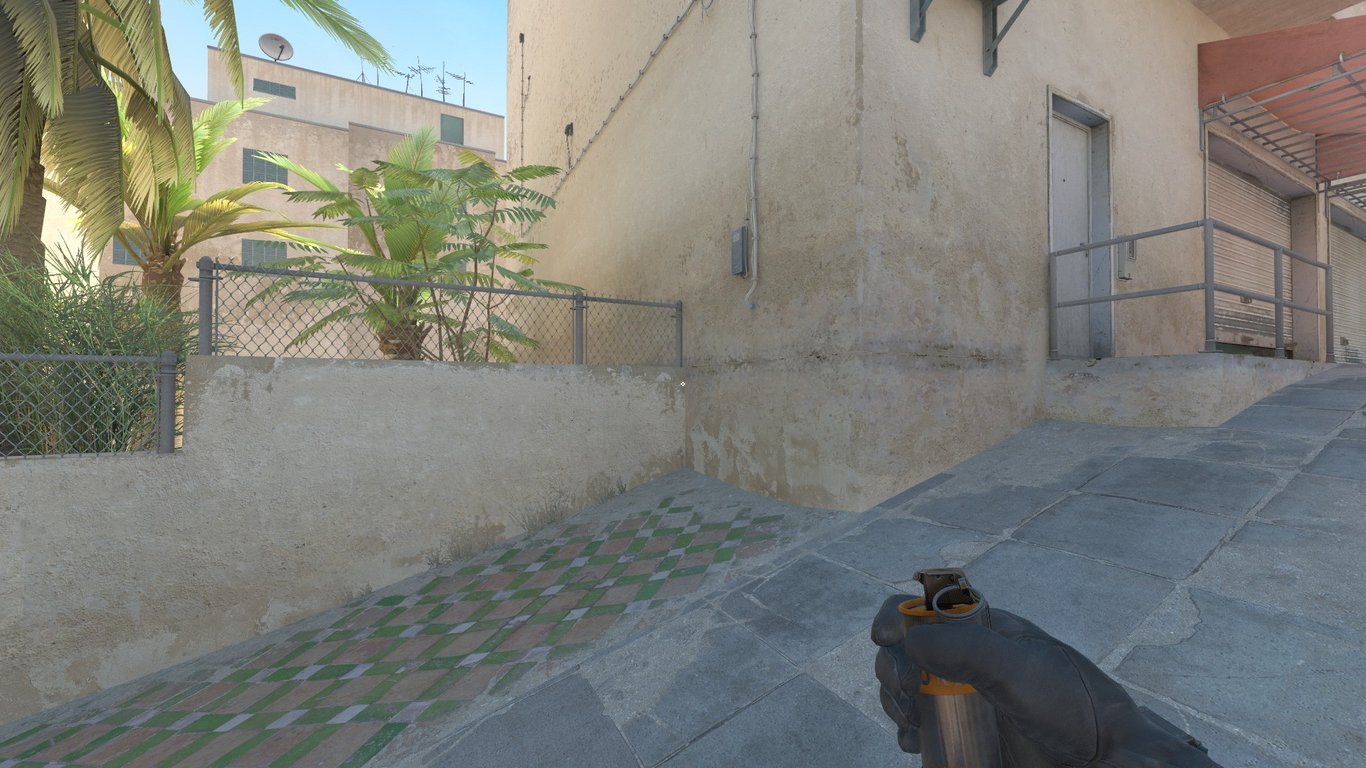
Next, you’ll want to position your crosshair on this mark on the lip of the roof, and simply Jumpthrow.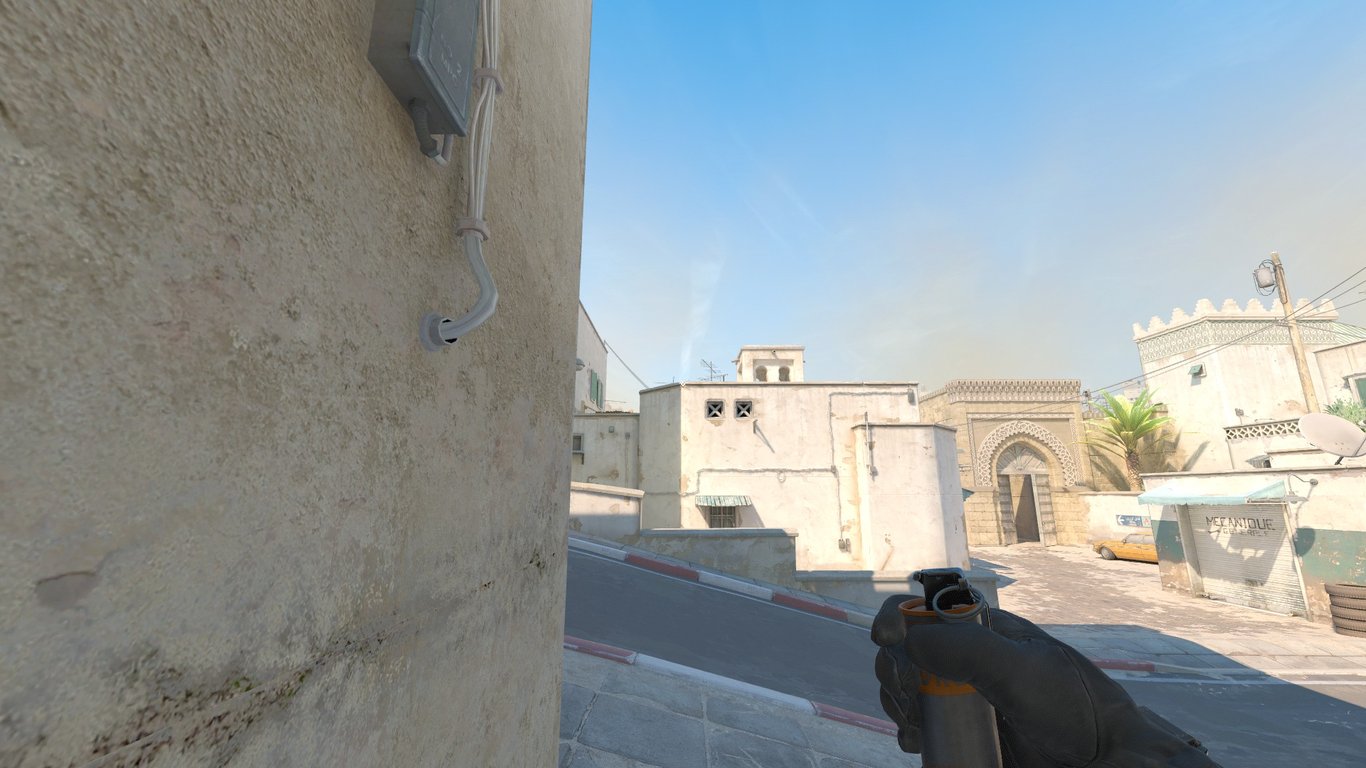
If thrown correctly, the smoke will bounce perfectly onto Xbox and look like this: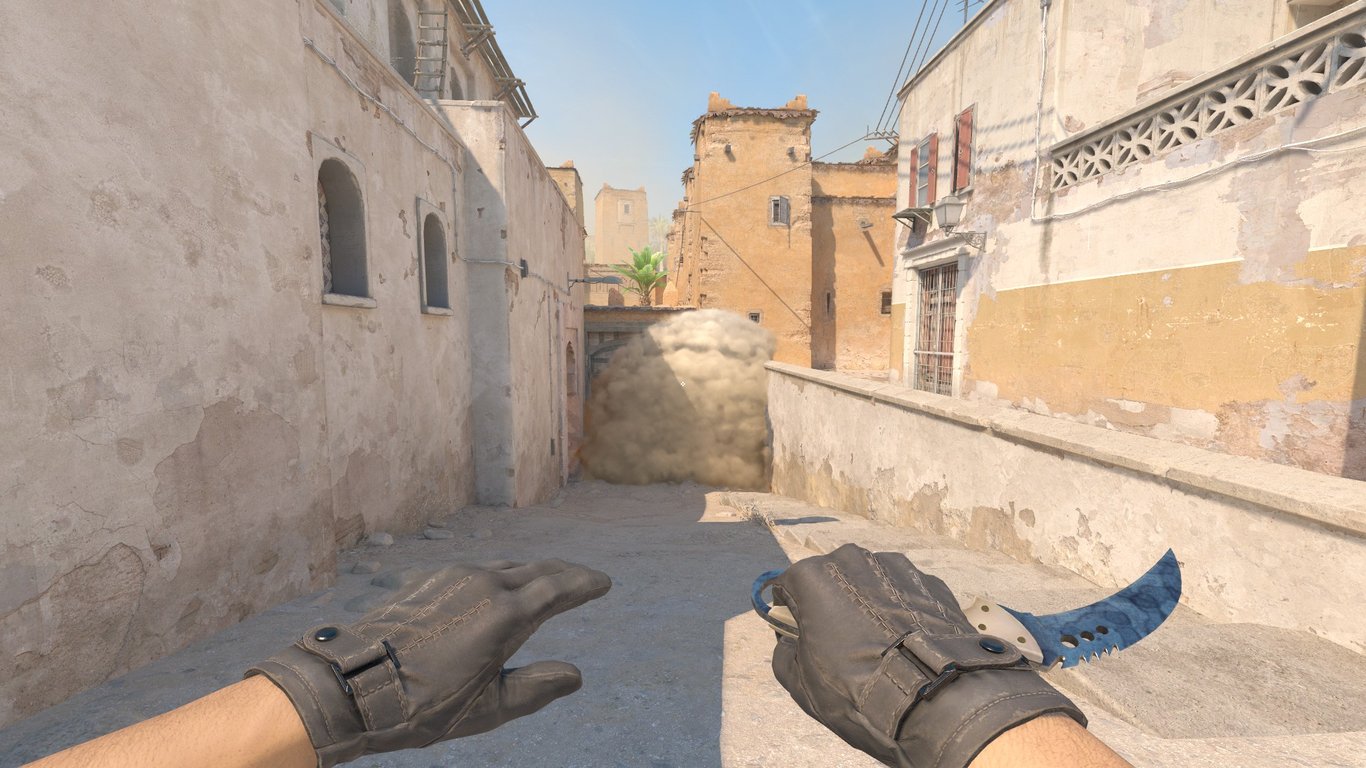
Mid-To-B Smoke
Here is a fine example of a smoke that has had a significant change in how it’s thrown as the game has transitioned from Global Offensive to CS2. This smoke is typically used when the T Side is transitioning from a Mid default to a B split, although it can also be used to manipulate CT focus and rotates, and potentially leave a gap open on the A Site. Here’s how you throw it.
Firstly, you’ll need to be tucked into the corner of Xbox, as shown below.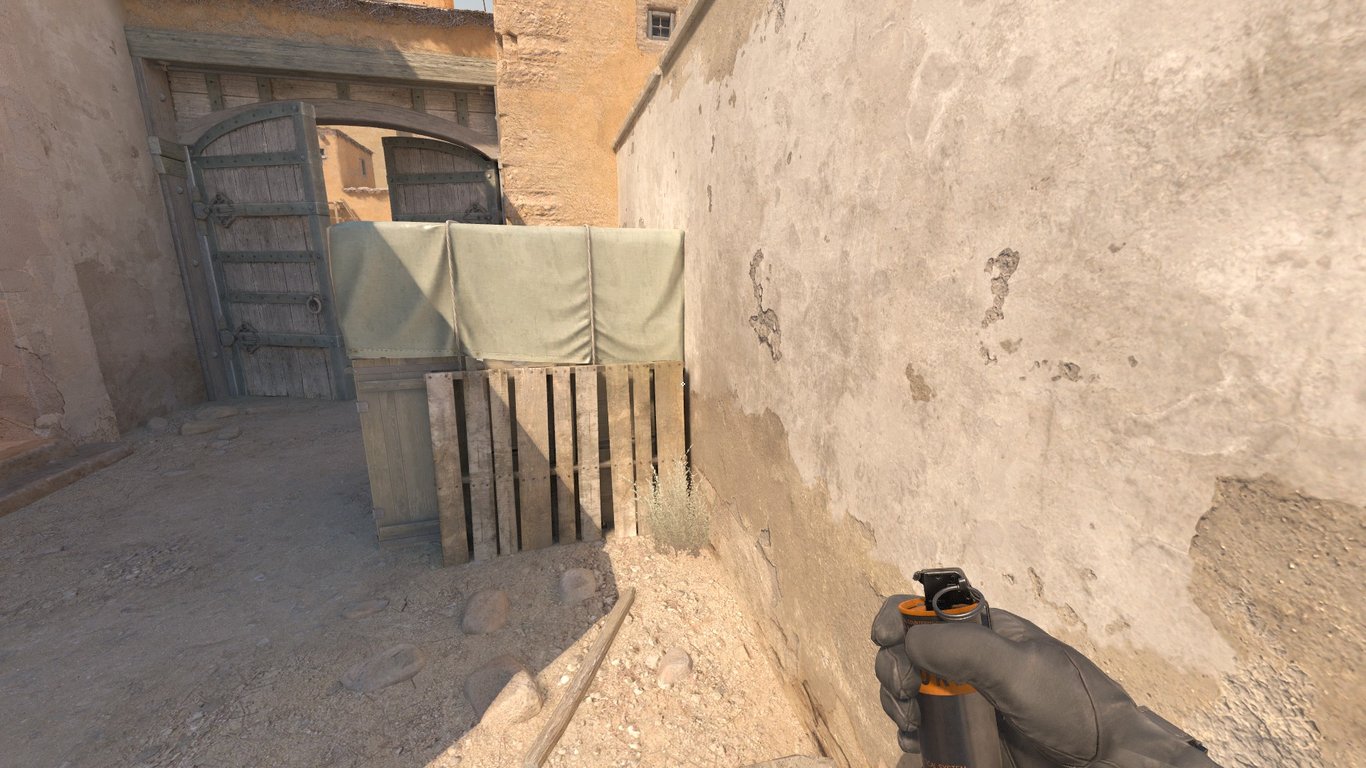
Next, you’re going to want to find this spot on the right side of the thin plank, as shown.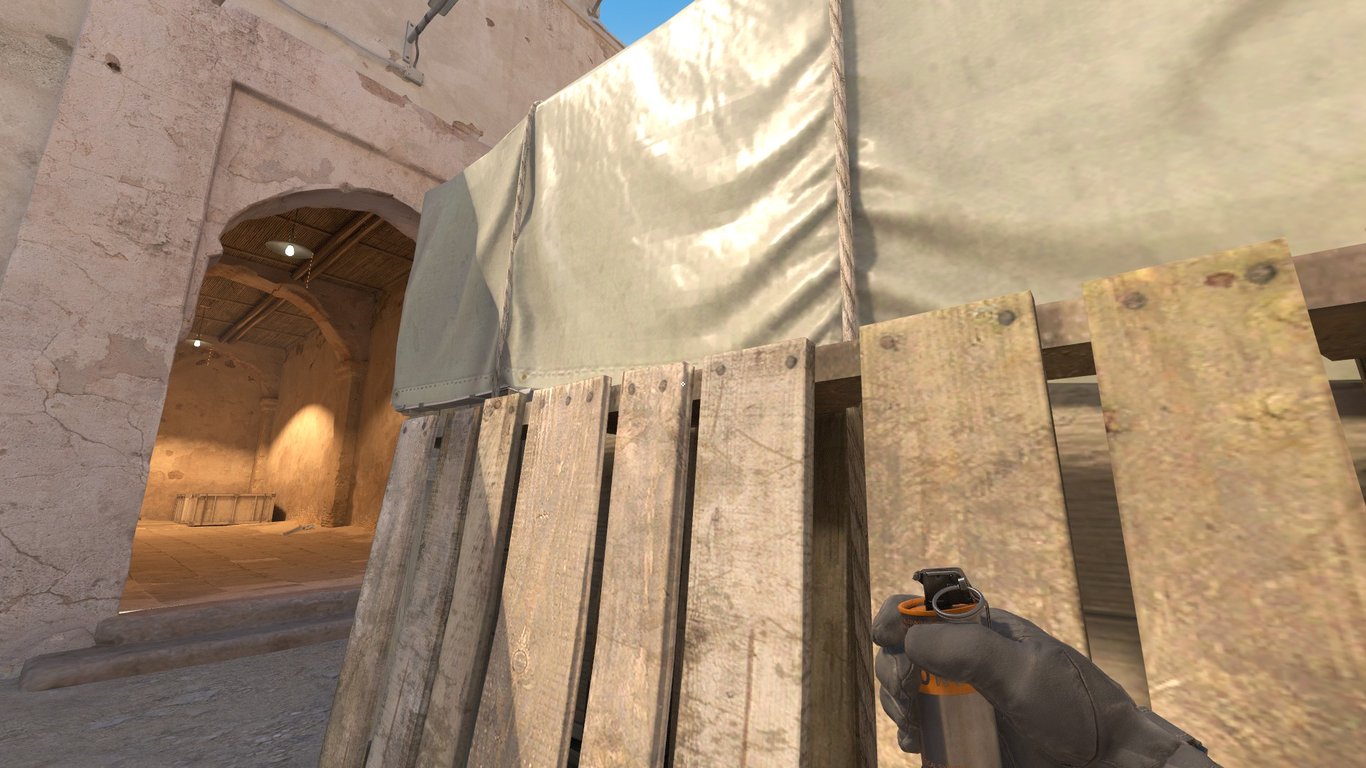
Now, you’re going to want to Jumpthrow whilst crouching. If thrown correctly, the smoke will land properly, denying any CT information on the cross to B site, and should look like this:
CT Cross Smoke
This smoke is one of the most commonly thrown on the map, as it’s essentially the only way to finish a Long Take without getting picked apart by the variety of elevations on the CT-to-A cross. Luckily for you, it’s another very simple lineup and one that will really help your Dust II T Sides.
Firstly, you’re going to lineup on the right side of this blue box.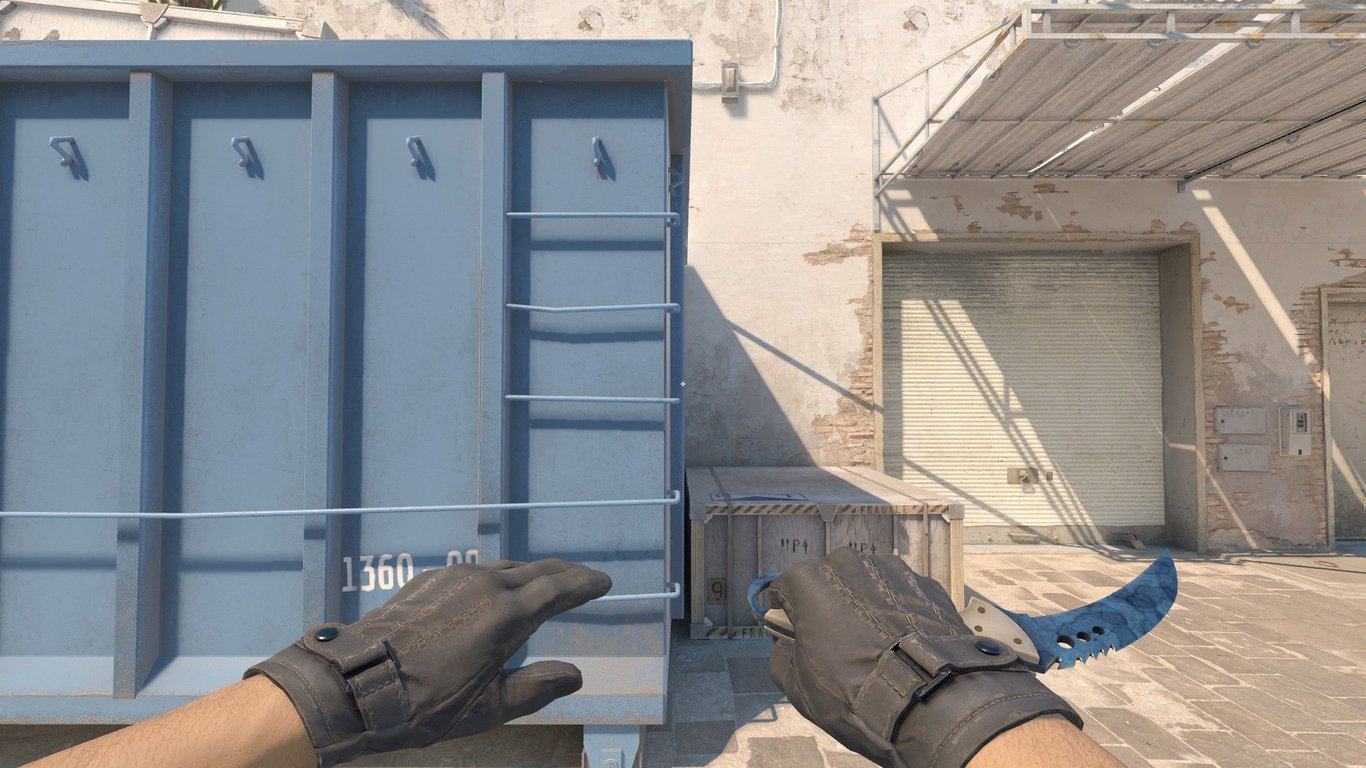
Next, position your crosshair here, just in from the corner of the roofing.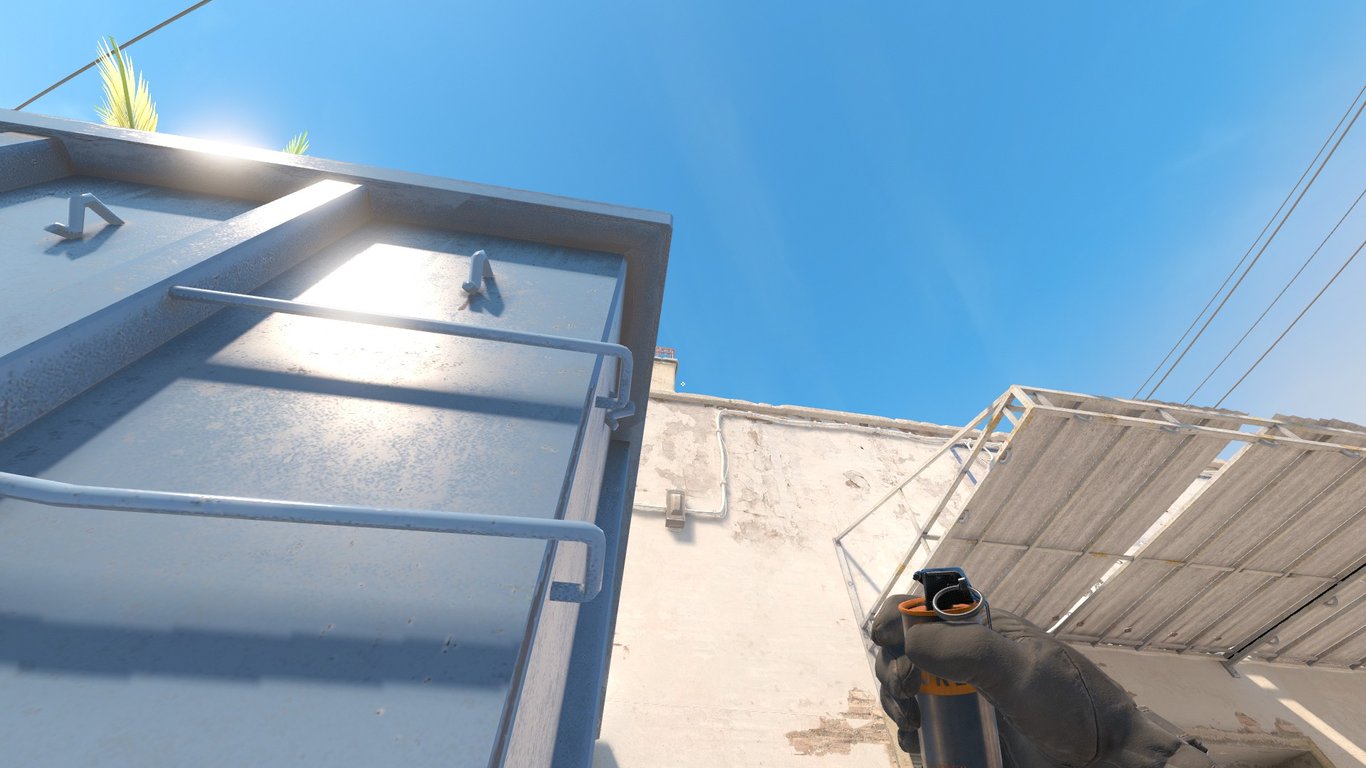
Finally, simple left click throw. It couldn’t be easier.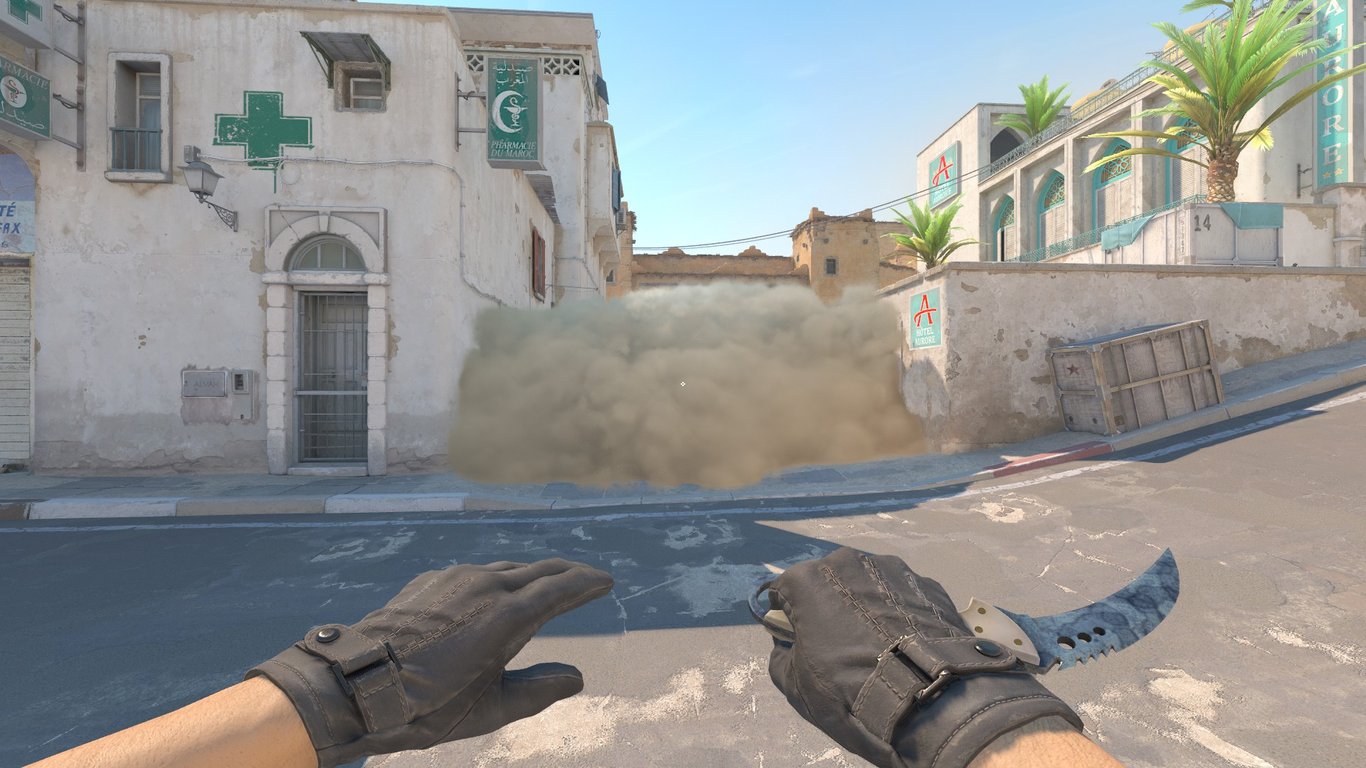
Long Take Flashes
Many people throw many flashes when their team is taking Long. It’s a rule as old as time that, when your teammate is flashing for you, the flashes will be awful, but when the opposing team is flashing you as you attempt to hold Long, you’ll be full-blind for weeks. Let’s change that.
For these Long flashes, you’re going to lineup in the center of the wall, as shown.
Next, find the top of the white arrow and move up in a straight line until you reach the top of the wall.
Once you’ve found the right lineup, just Jumpthrow. Your team will thank you for the free kills.
B Door Smoke
For our final piece of utility of the day, we’re going to take a look at the B Door smoke, thrown from inside Upper Tunnels. This is a crucial smoke when it comes to taking control of the B Site, and should really be thrown every time you execute. Here’s how to throw it.
Line yourself up on the left-hand side of the wooden crate, as shown.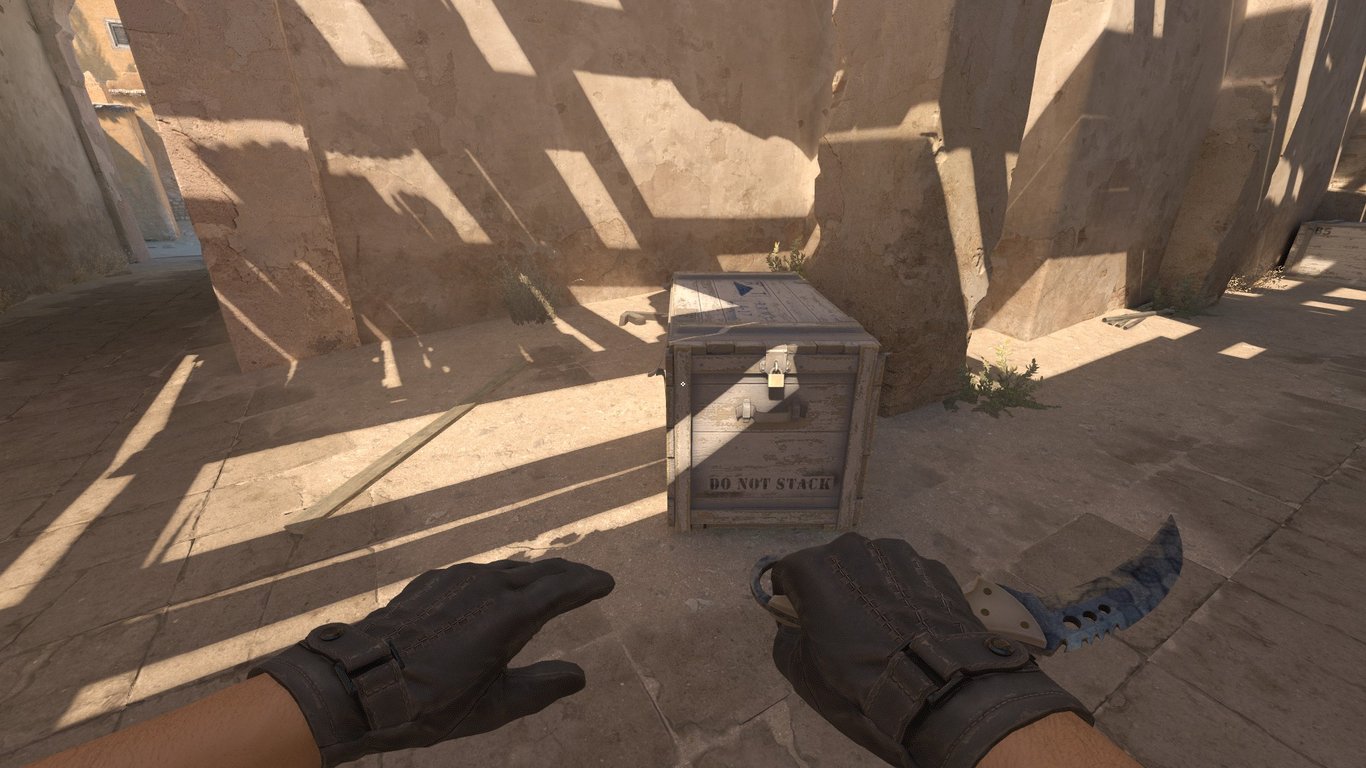
Next, get your crosshair positioned as shown: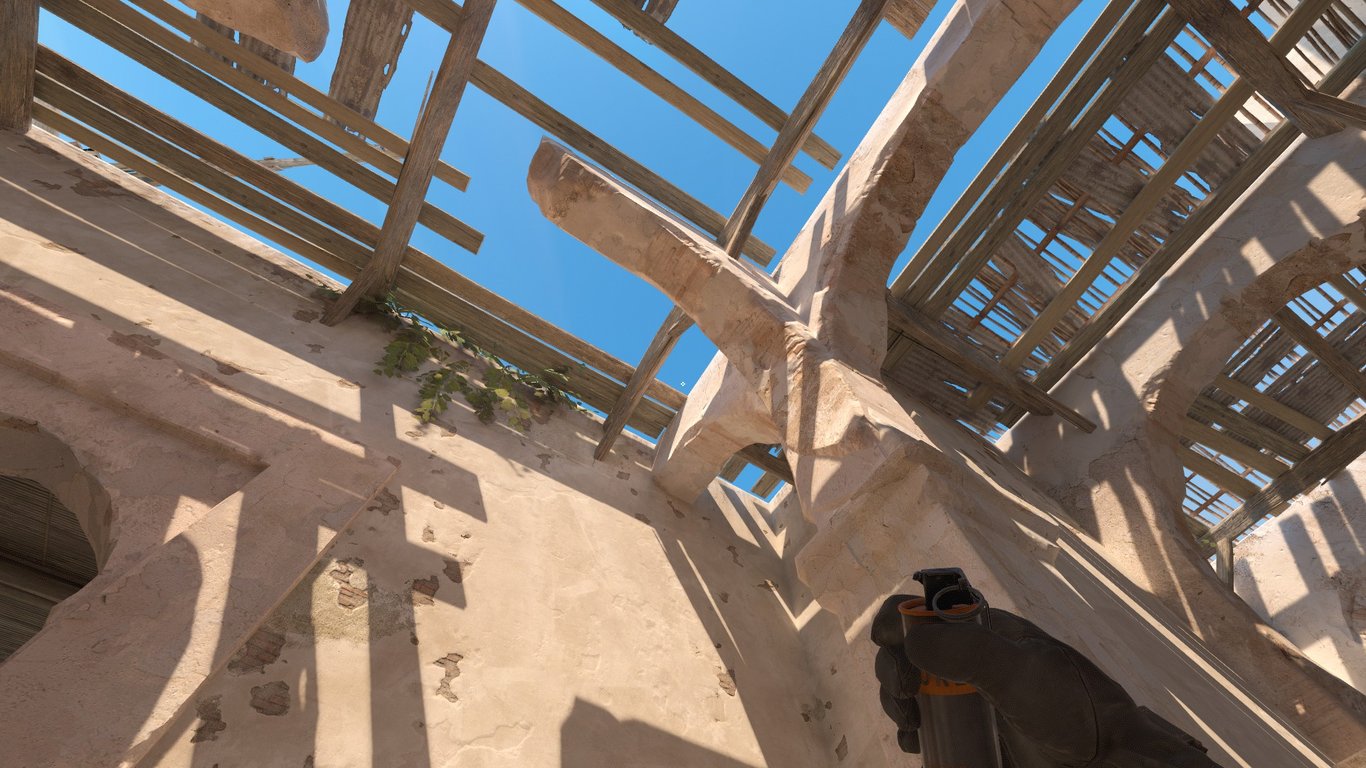
Then, simply left-click throw. Your perfect B Doors smoke will land like this: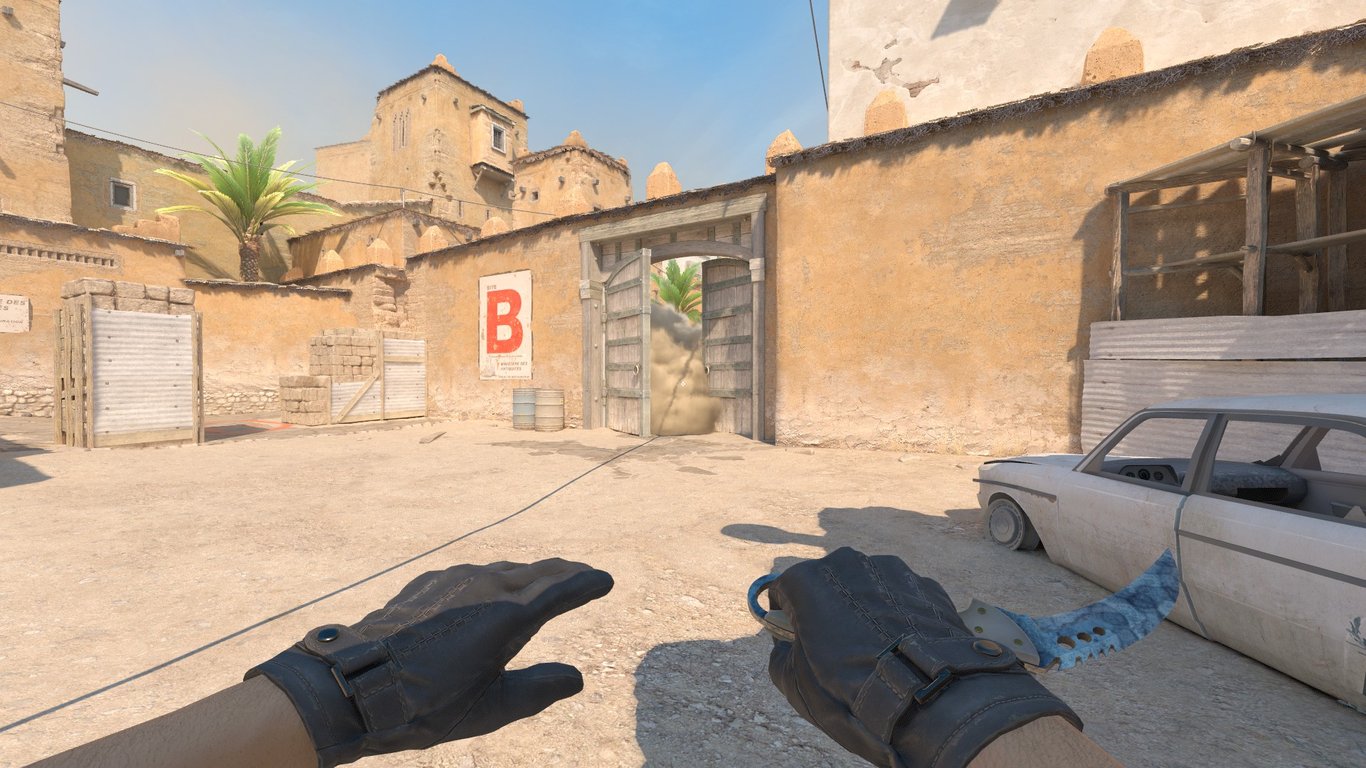
So, there you have it. A little dive into some of the most useful utility on Dust2. Of course, if you want to practice this utility or learn some new nades of your own, head over to a NADR server and get cooking. If you don’t already have a Refrag subscription, you can save 15% by using code utilitysecrets15 at checkout!
Recommended Posts
 Samuel Allen
What’s The Best Resolution For CS2?
 simba
simba


