 clegur
Elevate Your Way to Victory: Essential Overpass Boosts in CS2.
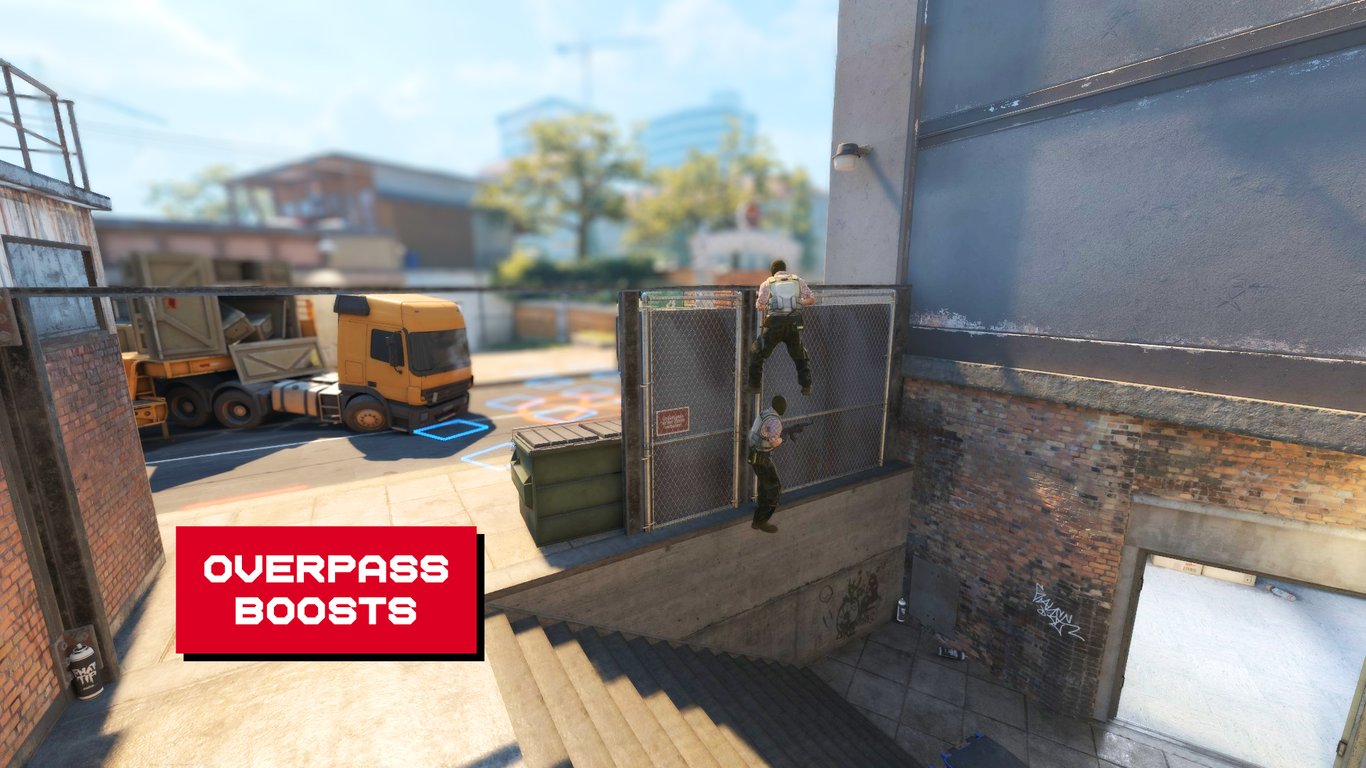
Overpass has gained a reputation as a boost-friendly map, especially since the olofboost in 2014. Boosting, a strategy where one player jumps on top of another to reach higher positions or maintain unique angles for surprise attacks, is a simple yet effective tactic that requires no special equipment, making it an excellent option during force buys. Boosting can provide significant advantages, allowing players to hold positions and angles that would otherwise be inaccessible.
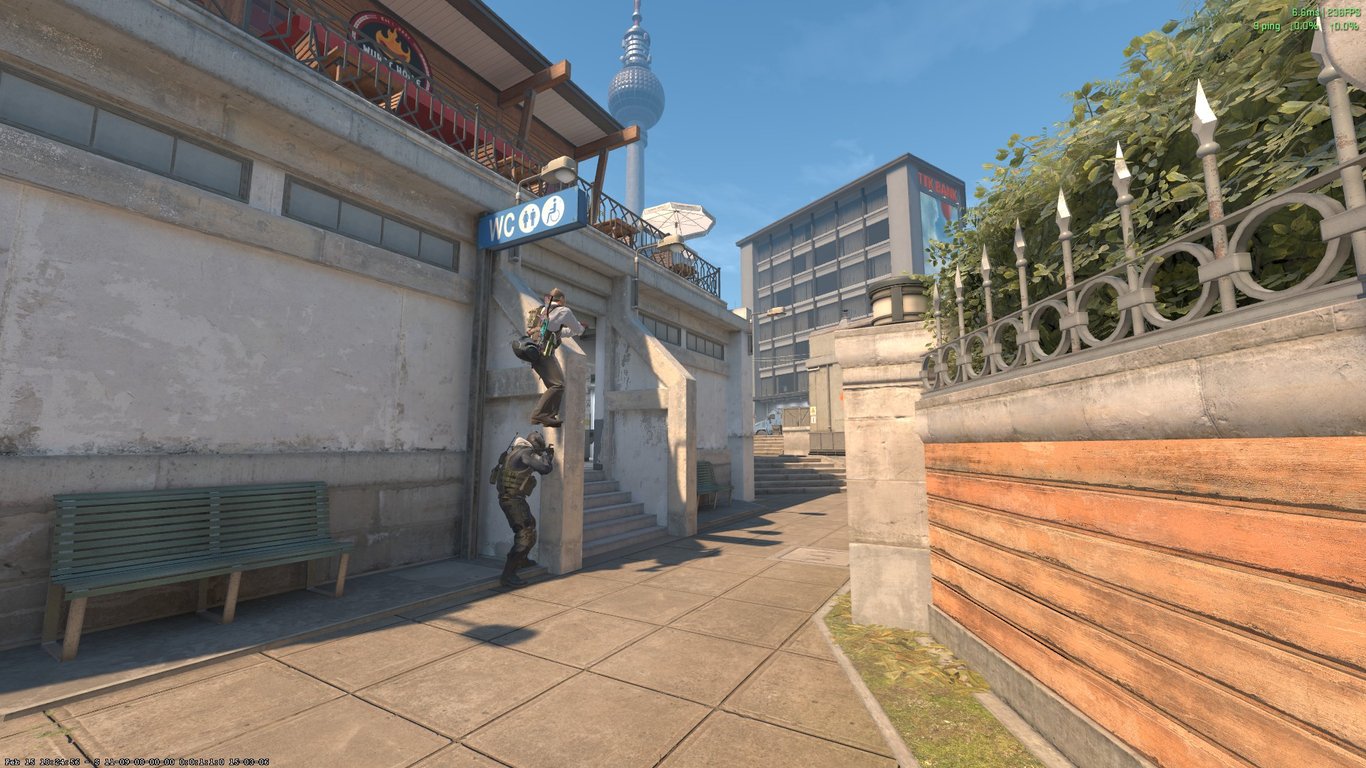
The infamous Olofboost
This strategy shines especially during force buys, allowing teams to maximize their limited arsenal without the need for additional utilities.
However, boosting isn’t without its risks. Once your elevated position is discovered, it exposes both players involved, offering savvy opponents a chance to capitalize on this information. Additionally, the threat of an enemy catching you mid-boost can quickly lead to a disastrous outcome for your team. That’s why understanding your environment and carefully weighing the risks and rewards is crucial for successful boosting.
In this article, we’ll guide you through some of Overpass’s most notable boost spots, offering insights on how to leverage these positions to your advantage. Whether you’re looking to surprise your opponents or gain a strategic viewpoint, mastering these boosts can be a game-changer.
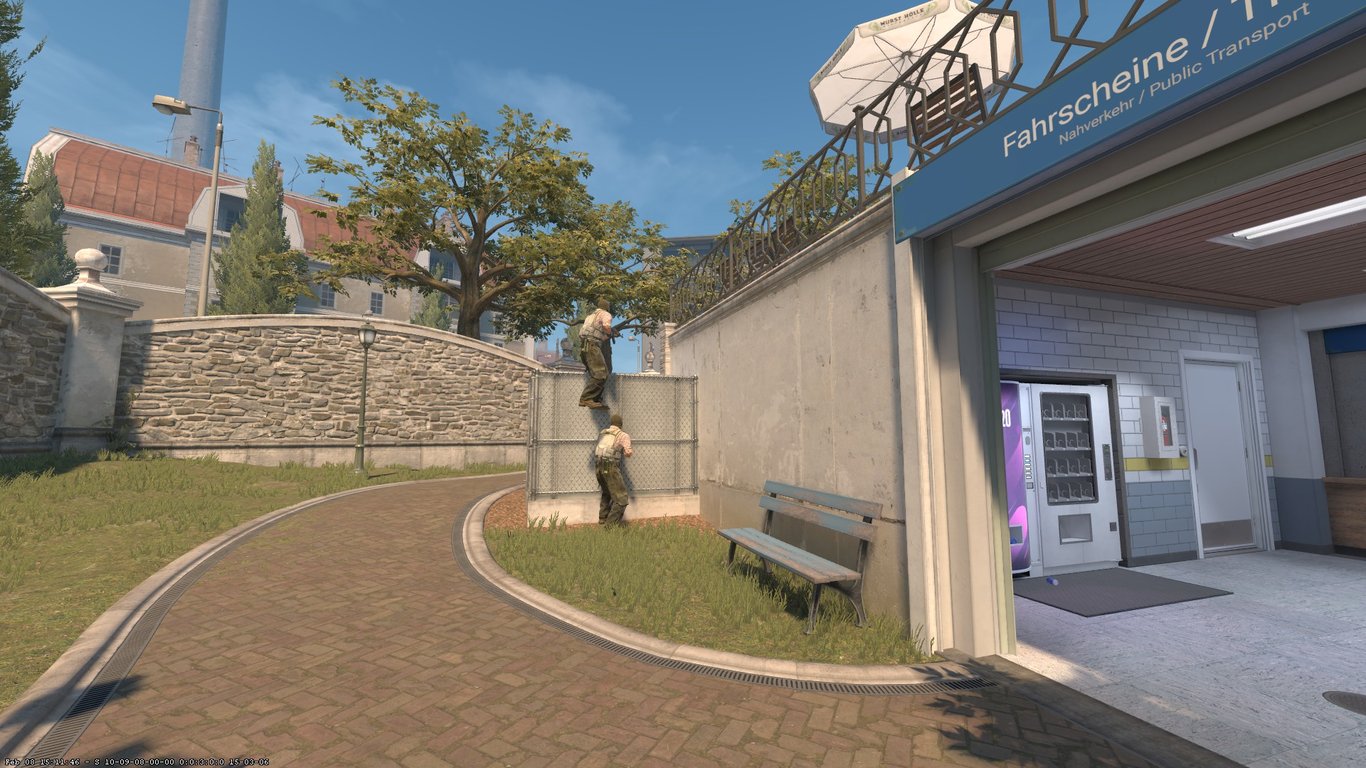
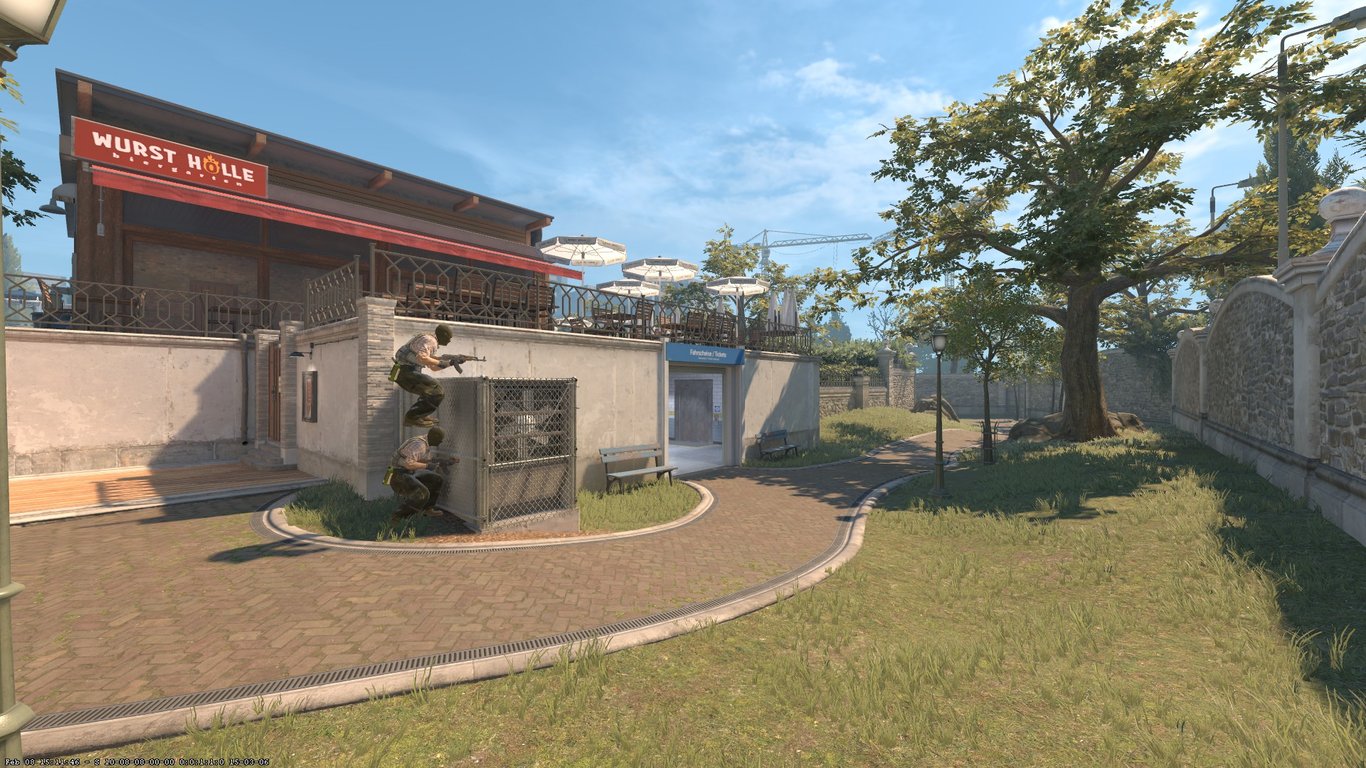
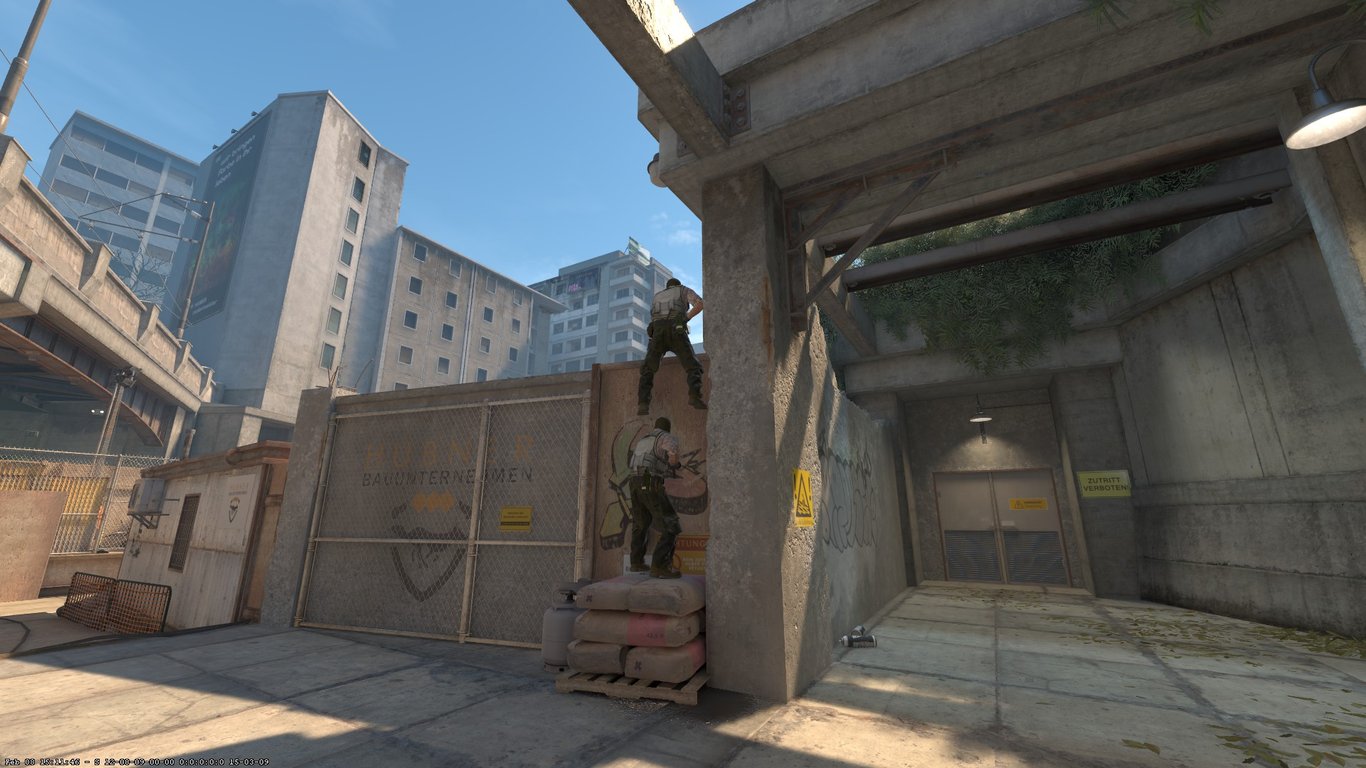
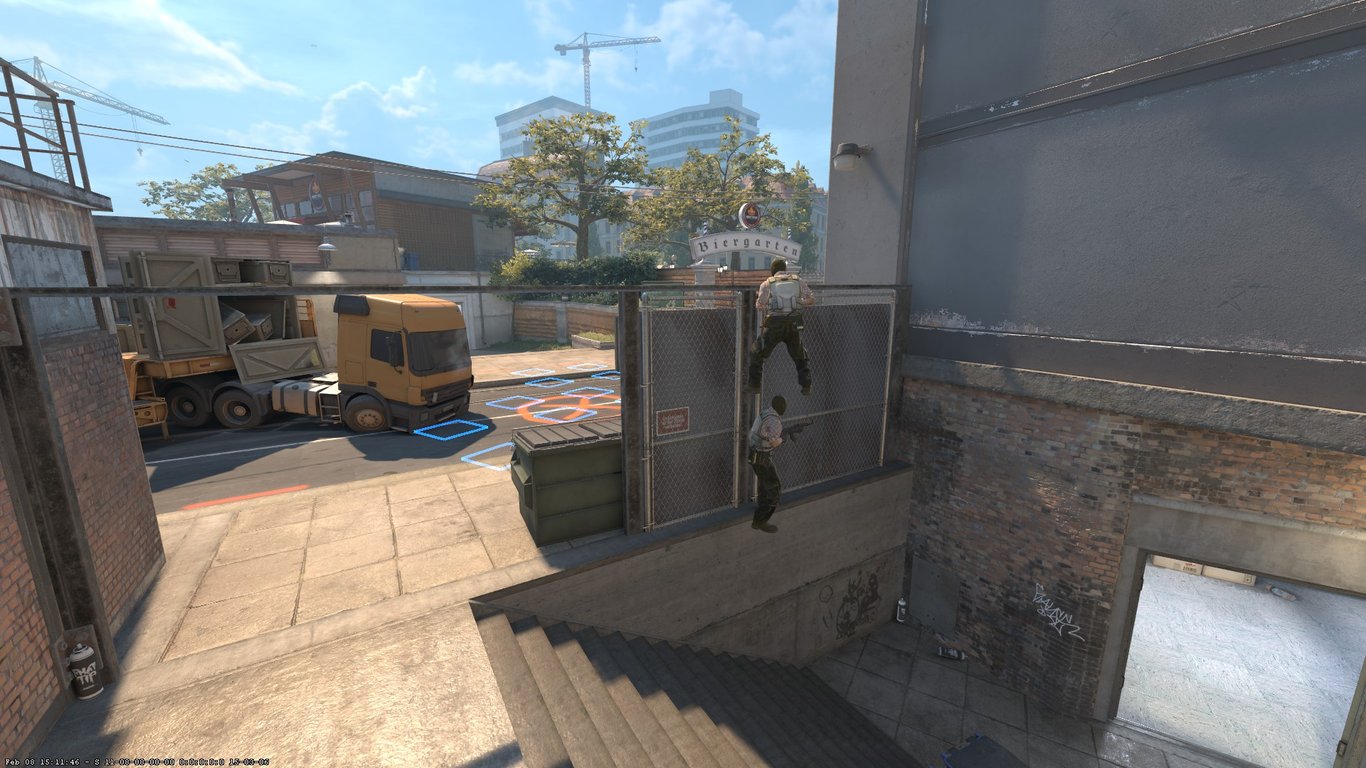
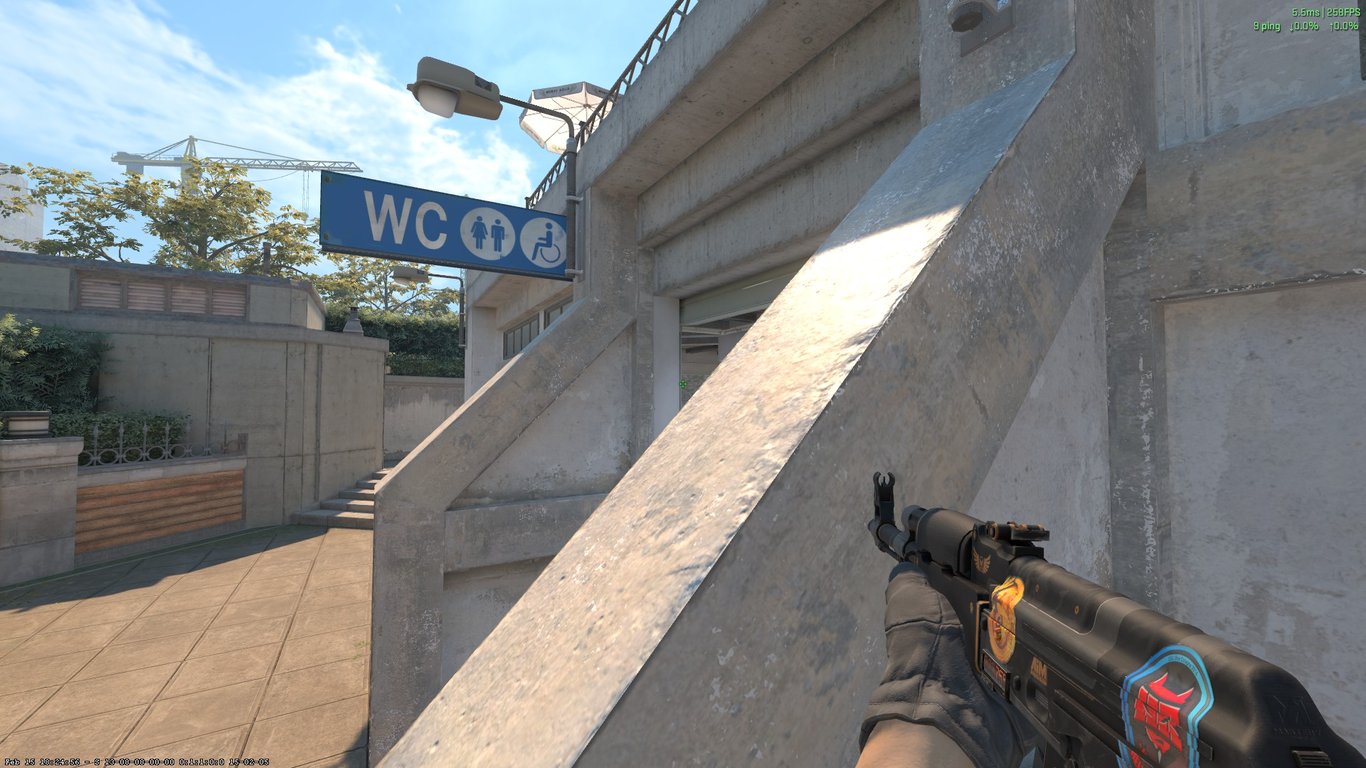
The bean can or short Boost

An all-time classic, even in CS:GO, was the short boost. It allows you to spot heaven, midsite, barrels, and a few spots around monster. It is a good gimmick play and can allow you to go for a low-risk attempt at an entry that is nearly impossible to trade. Just watch out if you do this boost more often in a match; the enemies might preaim it or even expect it if there’s a CT close by that can hear you jump on top of your teammate
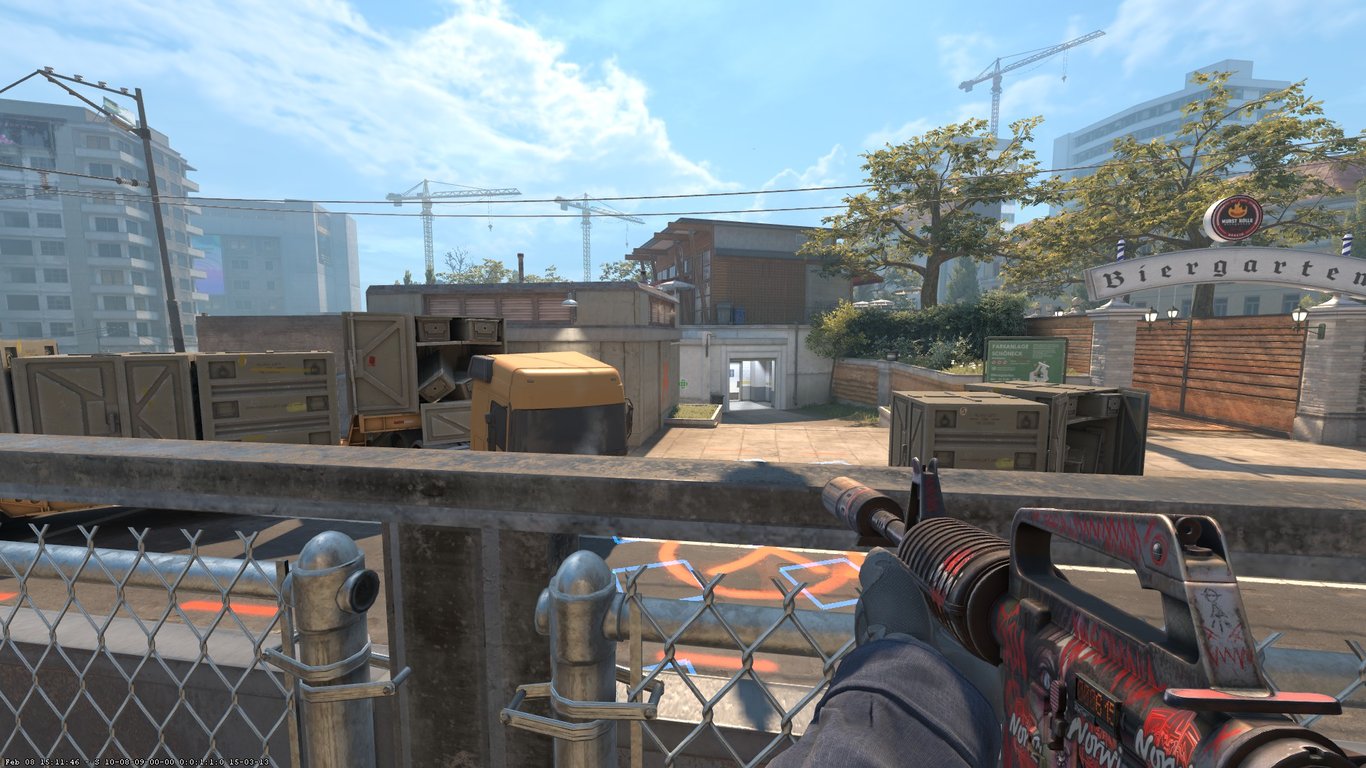
The playground Boost
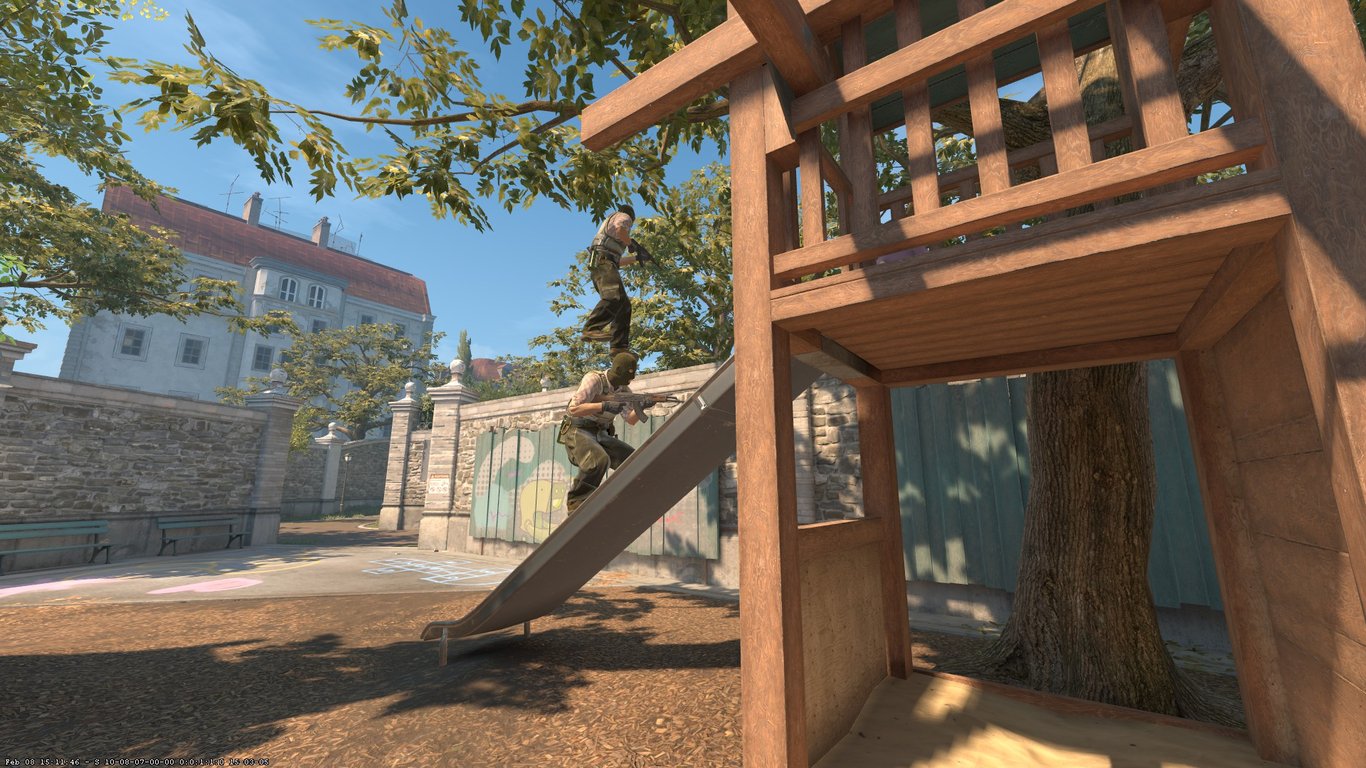
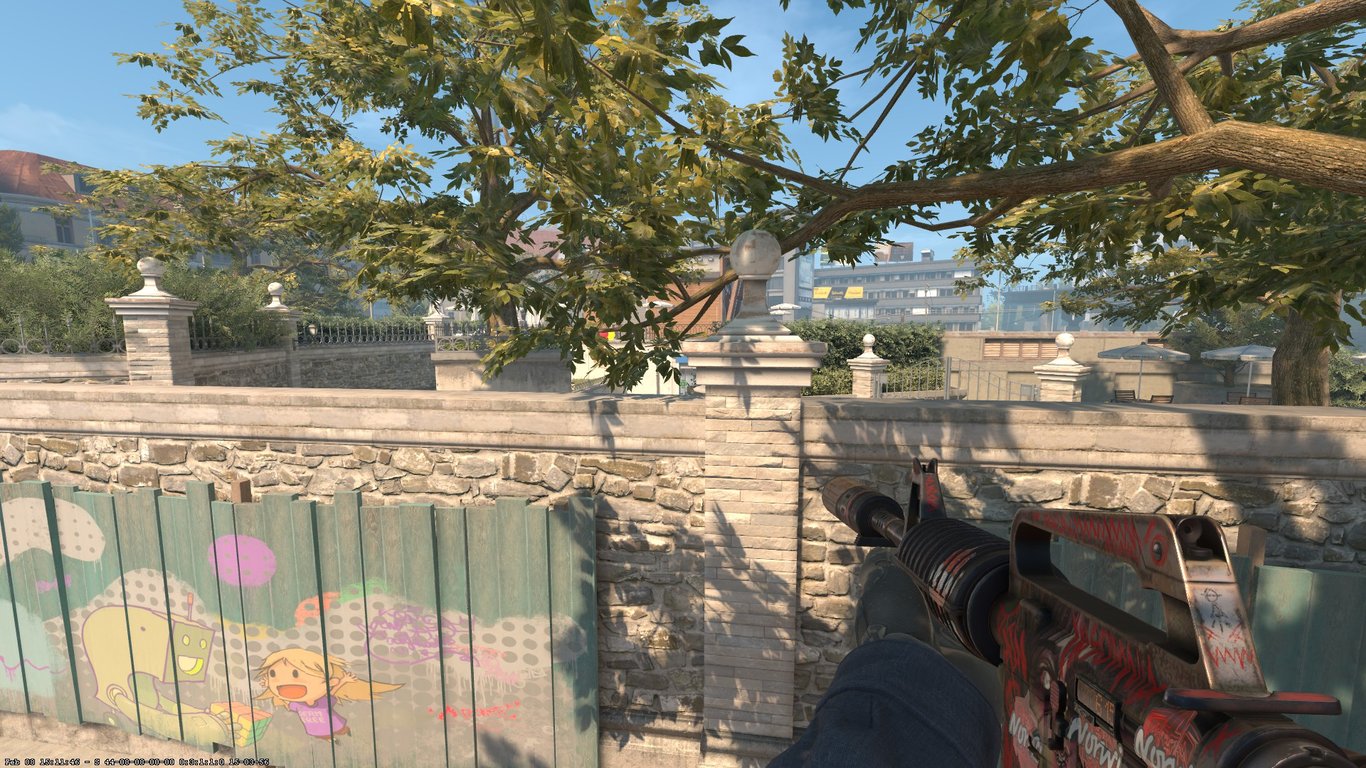
A lot of AWP’ers like to just hold aggressive angles until they spot a T and then fall back to a more passive angle. Often, after attempting the mid-pick, AWP’ers will hold the mid walk-out from bathrooms until they get smoked off. Against this type of AWP’er, this boost might be very effective; it allows you to spot the left side bathroom entrance and even clear all of party if you have another teammate molly the close tree position. With all of the angles an AWP’er needs to hold, it is basically impossible that they’ll preaim you
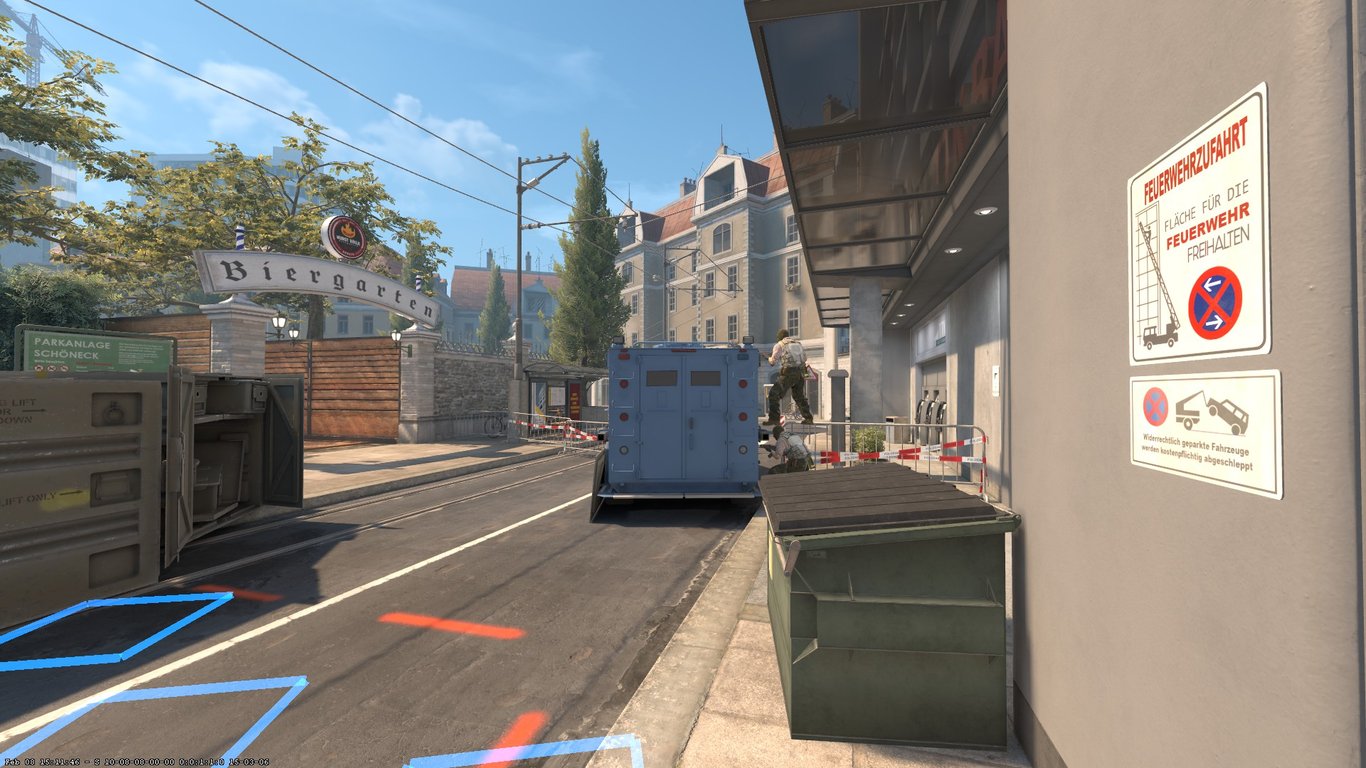
Long generator or flowerpot Boost
While it is possible to self-boost onto this wall using movement skills and the bench just behind you, using a teammate will make less sound, require less movement skill, and allow you to expose less of your model at once. Making it overall just a little bit less risky. You can stay on this boost to hold anyone peeking long from A site while your teammates sneak up close by the wall, possibly even anti-flash, and then flood onto A site. As far as boosts go, this position is fairly common and quite vulnerable to flashbangs, so don’t be too surprised if you get cleared.
The same boost is also possible for CTs earlier in the round. The same principle applies: early in the round, as the CT, you can get to long faster than the opponent, so as an AWP’er, you can still use the bench to self-boost into this position. However, won’t be possible later in the round when there’s a potential for the T-side to have taken long control. That is why this boost will be just a bit more helpful from the CT side. While the boost isn’t a huge off-angle, the remaining bit of surprise effect, especially as a late-round boost, might be enough to catch the enemy off-guard. Additionally, you can also peek into bathrooms from the boost when going wider.
The short Boost
Without a doubt, the most common boost on overpass is on the sandbags towards B. Boosting here allows you to see any T trying to take short, and if you blow up the connector door using a nade, it also allows you to see anyone trying to come up connector. T’s trying to take short already have to cover a lot of ground and positions, so even with the boost being so common, it still has a good chance at netting you either a frag or information. Keep in mind, however, that if the T’s use a flash to take short, you will get blinded unless you turn away. That’s why lots of players stay crouched or hidden until after they hear the flash pop and then peek up. This is to both dodge the flash and have even more of a surprise effect by timing the peek perfectly.
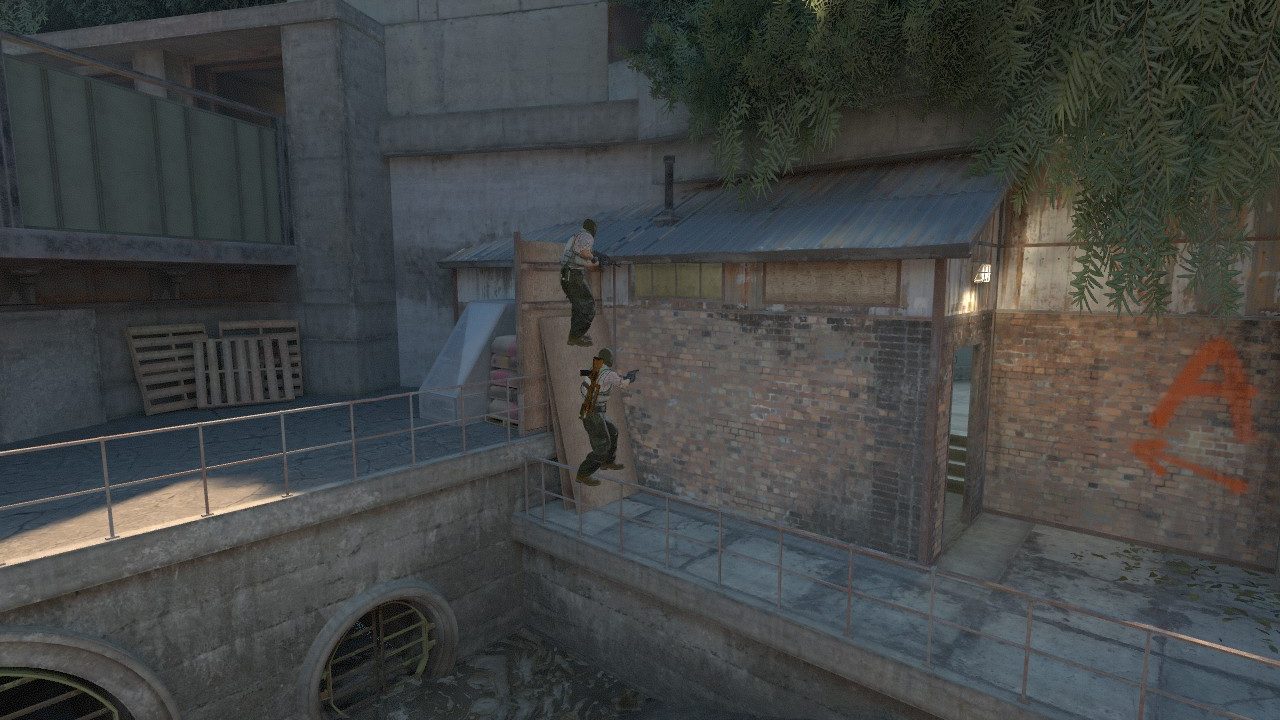
B CT Retake Boost
If you don’t want to spend any utility on holding a site or fear getting trapped inside the site by an execute, you can boost behind the CT wall. Depending on how far you choose to peek, it allows you to see anyone crossing into B site from monster or short while staying extremely well hidden. The CT model blends in very easily with the wall texture, and combining that with the unexpected position makes it almost a guaranteed frag if they come to the B site. When using this boost, you will almost certainly allow your enemy to get a bomb-plant but give your team the advantage in the retake by saving any utility you would have otherwise spent on holding the site.
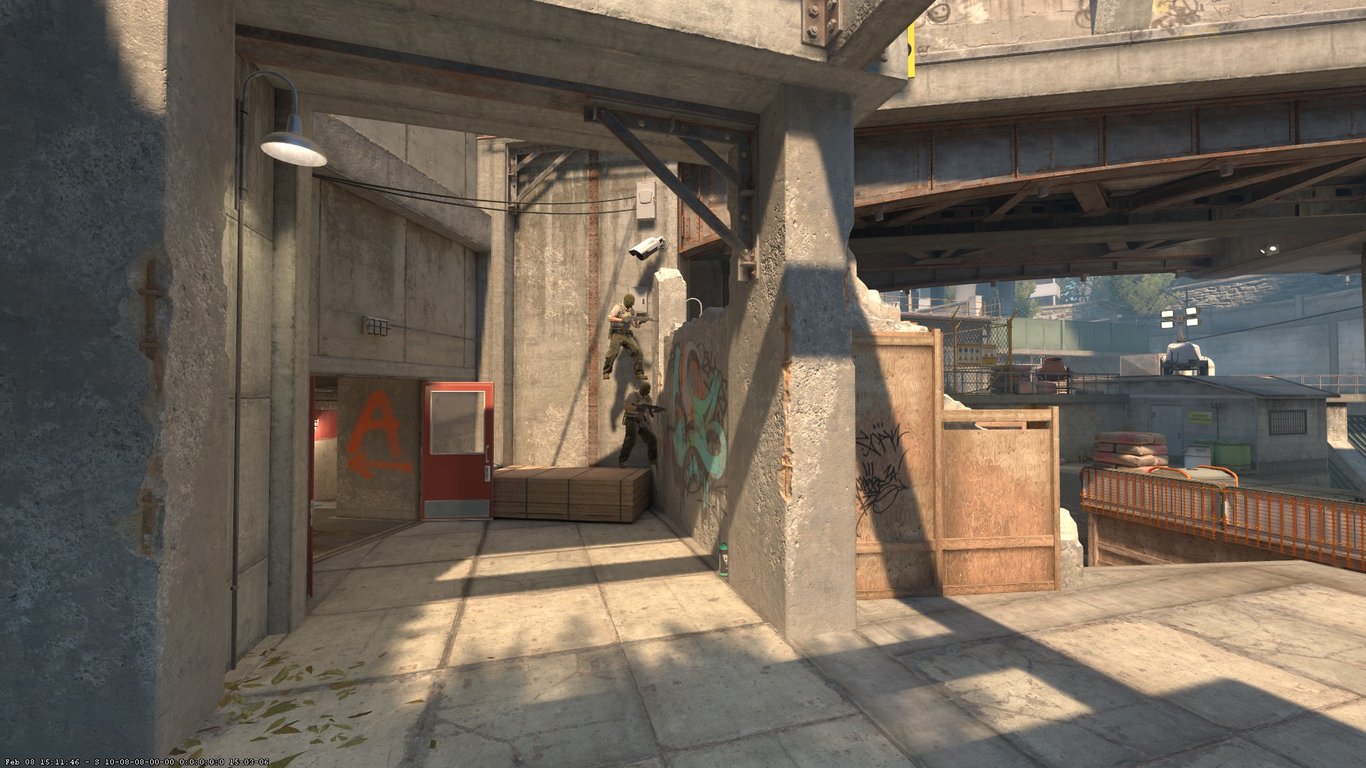
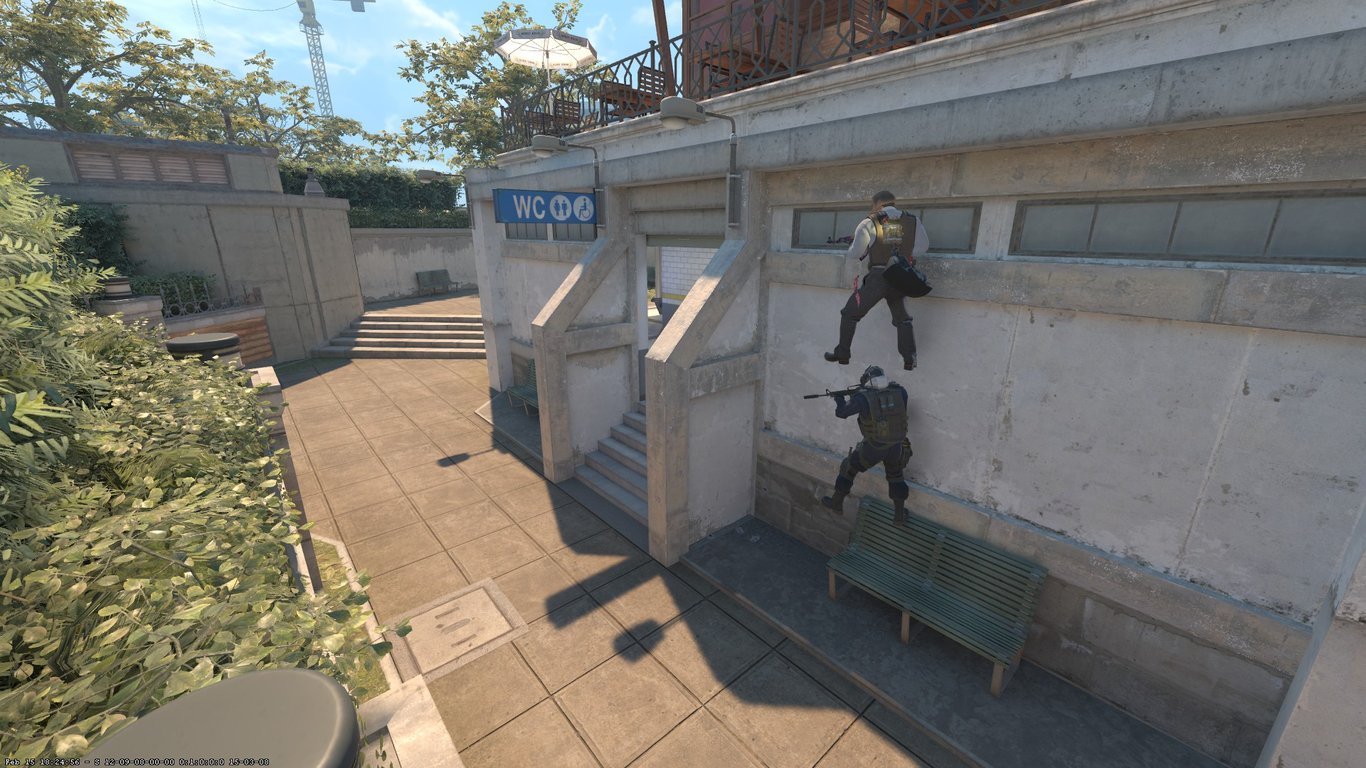
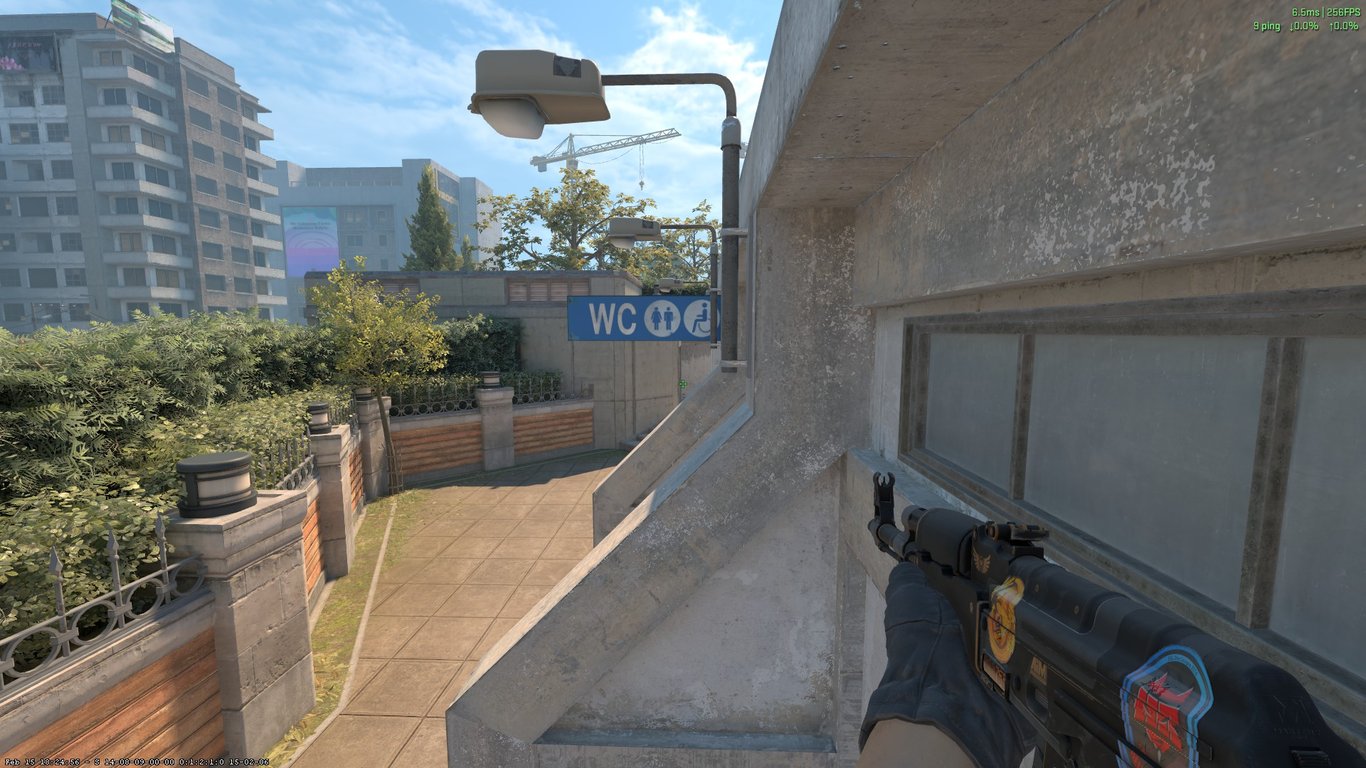
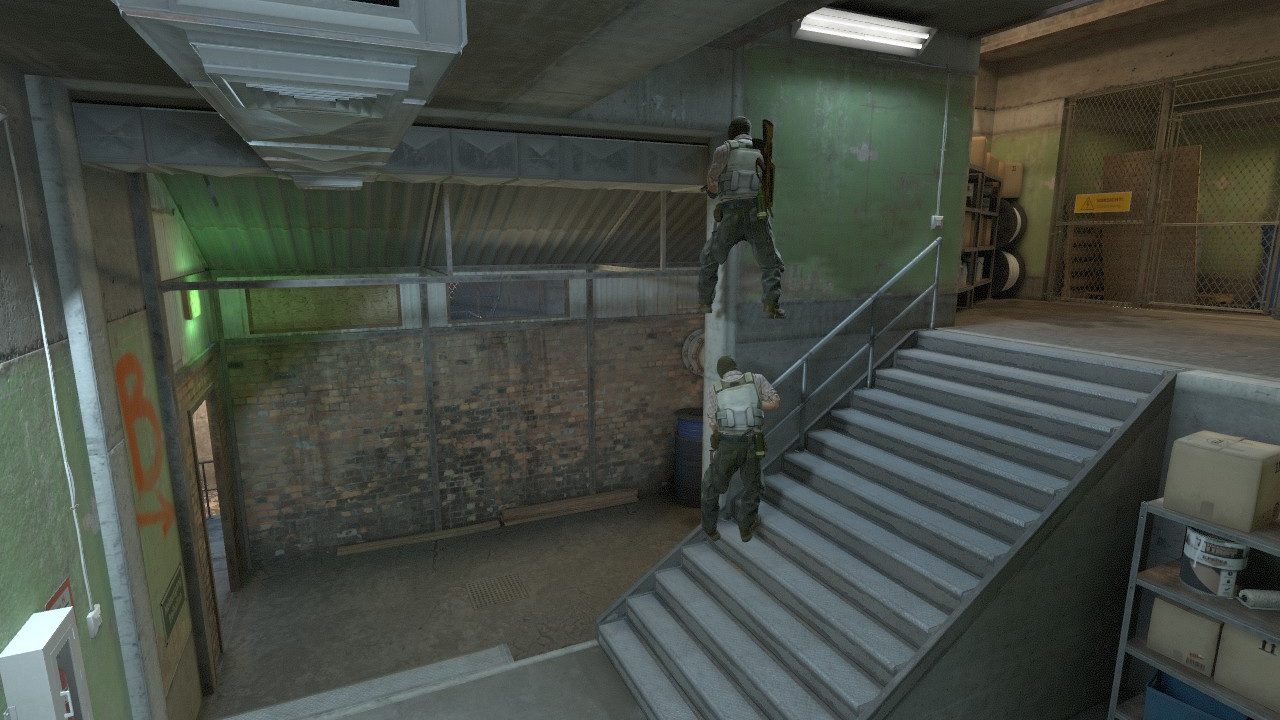
Stairs Boost CT A
In a similar vein to the previous boost, this boost also surrenders the site to your opponents, the tradeoff you get is a potential surprise frag on a player while you wait for your teammates to rotate. It’s a great boost to either hold on to your utility for the retake or to use while you are smoked off. However, this boost should be used sparingly as your opponents can easily hear you jump to boost, and the metal fence is very thin is likely to be wallbanged once they know you are there.
Bank Boost
This boost is highly situational, as it is quite easy to get attacked from the bathroom side if no one is holding it. However, it is also very unexpected, as this boost is rarely ever used. A lot of players use this gap to jumpspot long, so some AWP’ers might preaim it, but for the most part, riflers will have a hard time seeing you due to the surrounding textures and only your head poking out. You can also use it to peek long even if an awper is posted on the bank peek. For the most part, T AWP’ers will hold a narrow angle while their teammates walk up; this way, you can peek the riflers while not peeking into the angle held by the AWP.
Mid Stairs Boost
With this boost, you either gain a near-free kill on an unaware AWP’er holding mid-stairs or you gain the information that it’s safe to walk forward silently. This boost is quite powerful, as the map is so big that the CT’s need to leave some positions open. The CT-side’s strategy on overpass relies on knowing the T-side’s timings and when to fall back. If CT’s overstay their welcome and you manage to gain ground on them quickly and silently, you might be able to catch a timing on unaware enemies.
CT Divider or Bench Boost
The slanted divider walls at divider almost invite anyone to boost over them. You can boost on the bench to get an off-angle peek on anyone exiting connector, while the boosting player can hold for anyone clearing the divider position from bathrooms.
Alternatively, you can boost right next to the wall, which will give the top player the opportunity get a free kill on anyone pushing into party. This boost is a very committed boost. You only have one path to escape, which can make it quite hard to get away once spotted, so make sure to hit your shots.

T-Divider Boost
Like most other boosts, this one allows you to clear multiple positions, like close toilets or the top of right-side flowers, without the use of any utility. It also gives you an unexpected angle on anyone jump-spotting or a cheeky angle on anyone defusing if you choose the default plant.
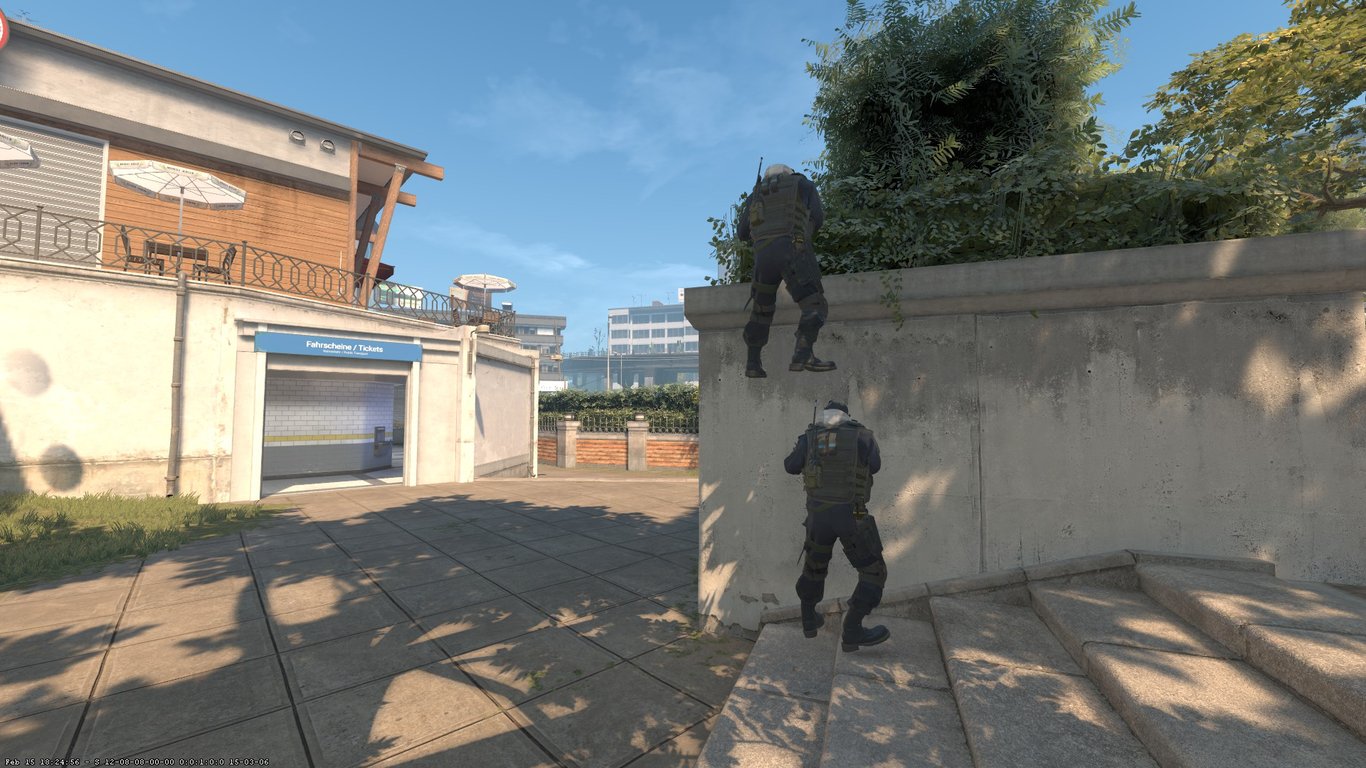
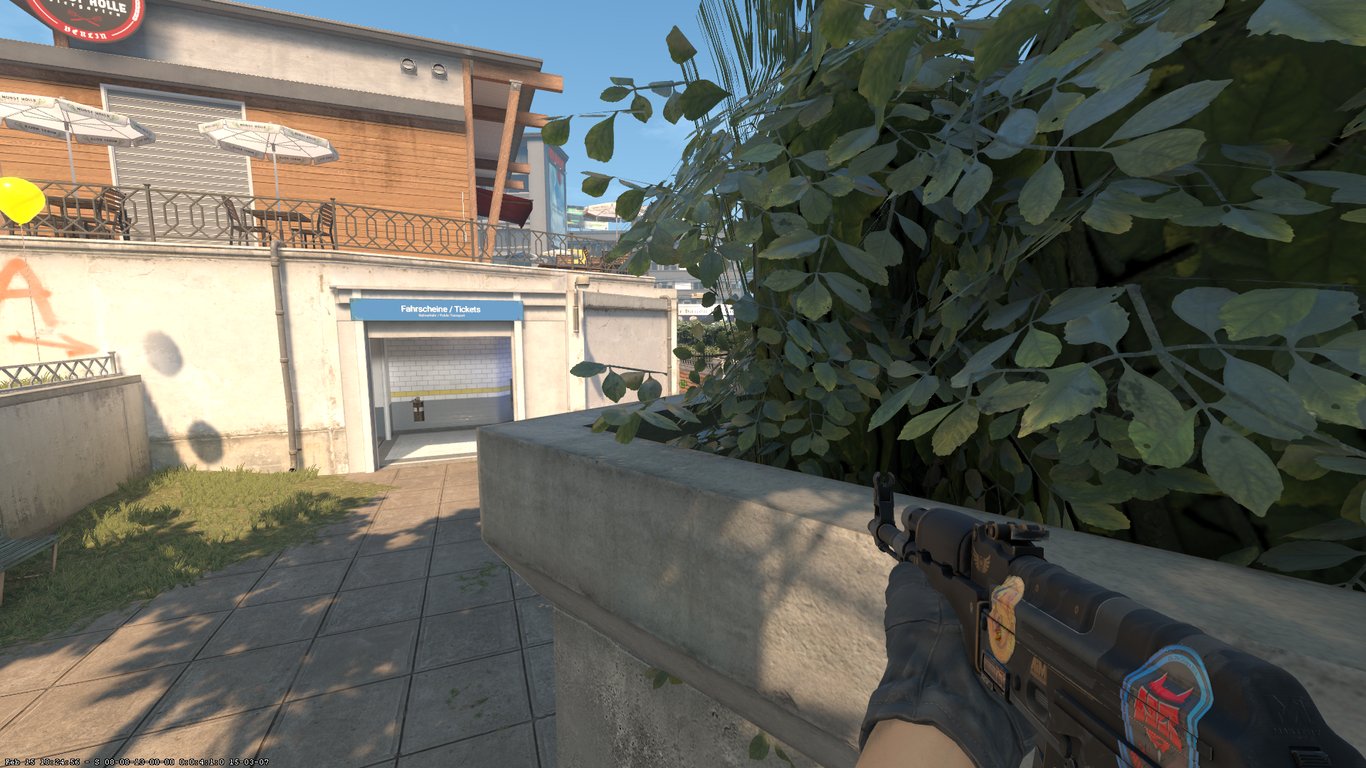
Sign Boost A site
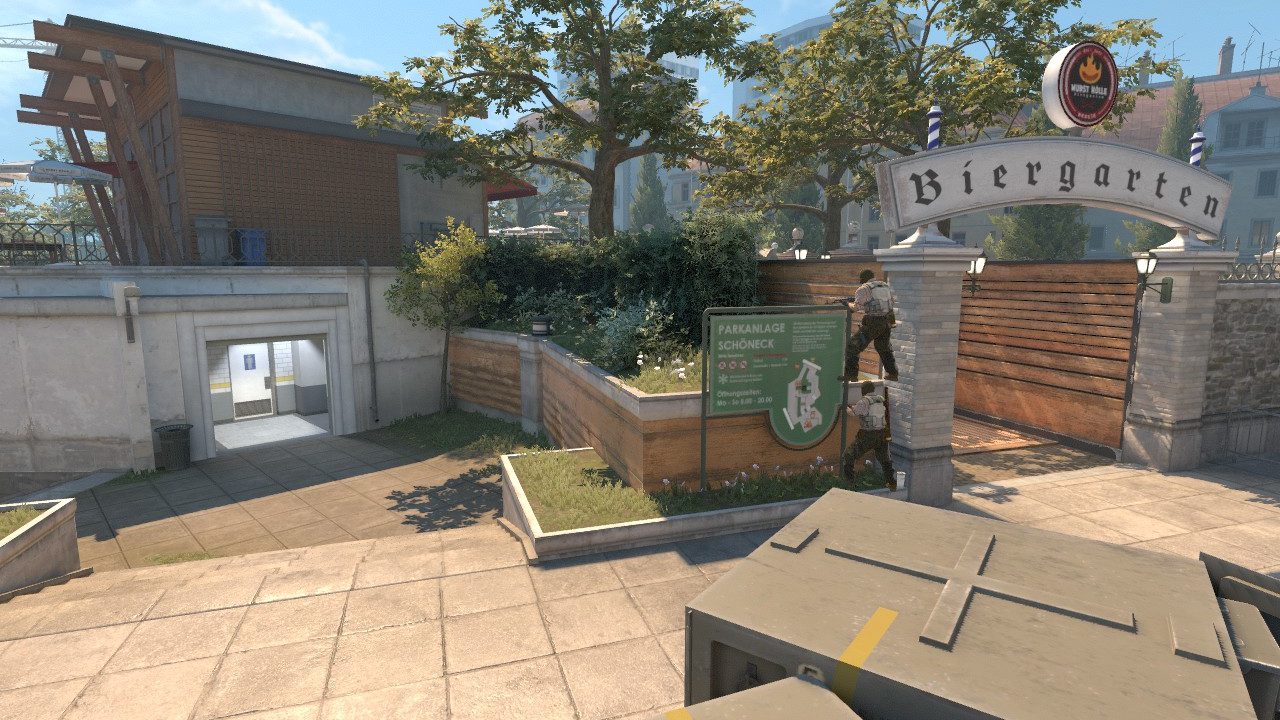
We looked at the Bank Boost before, which was designed to deal with long pushes but was vulnerable to anyone pushing through bathrooms. The sign boost is the exact opposite; it gives you multiple angles to look into bathrooms and makes you extremely hard to spot and hit due to only exposing your head surrounded by greenery. The great downside, however, is that you cannot spot long, and the boosting player cannot properly hold the long push either. Therefore, you either need another player spotting or holding the long push, or you can gamble that the enemy won’t come from there.
Short railing Boost
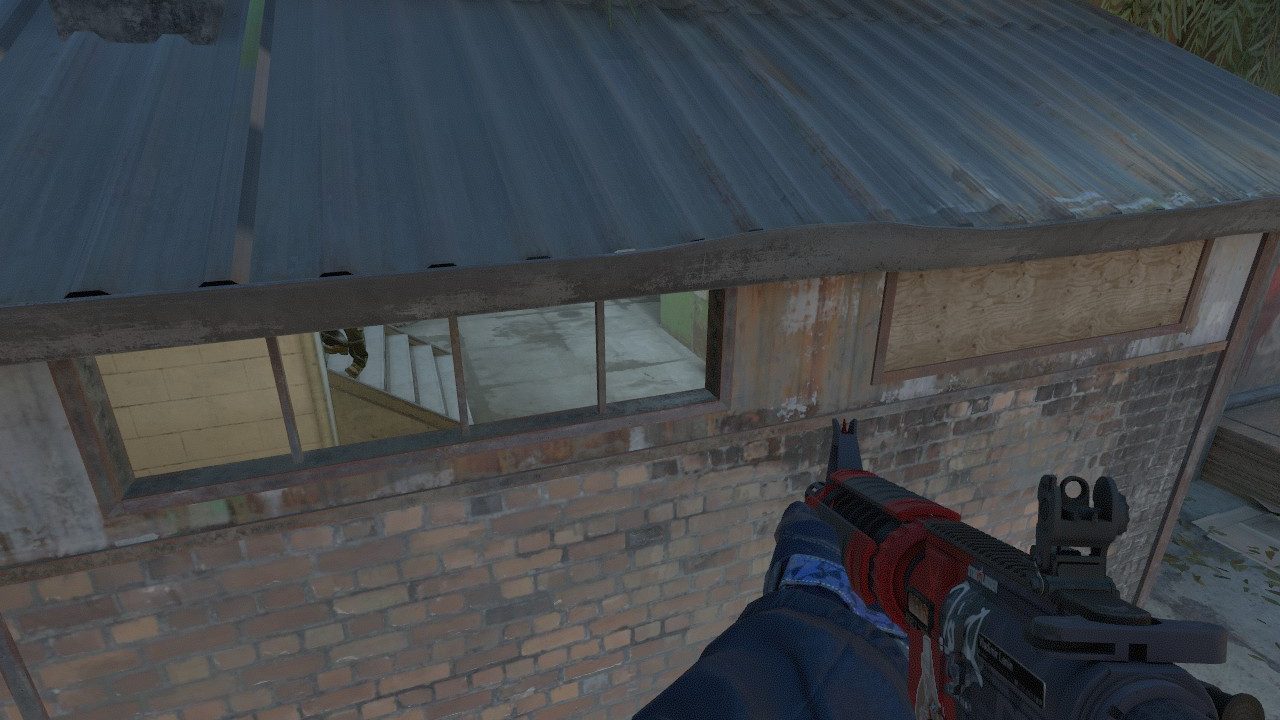
If you don’t want to make noise by blowing up or opening the door but still disturb any enemies rotating through connector, you can use this boost. By looking through the small window, you will be able to see anyone trying to clear or go up connector. This boost leaves you open for any opponents outside monster, so it’s one to only try when you’re absolutely sure you’re safe.
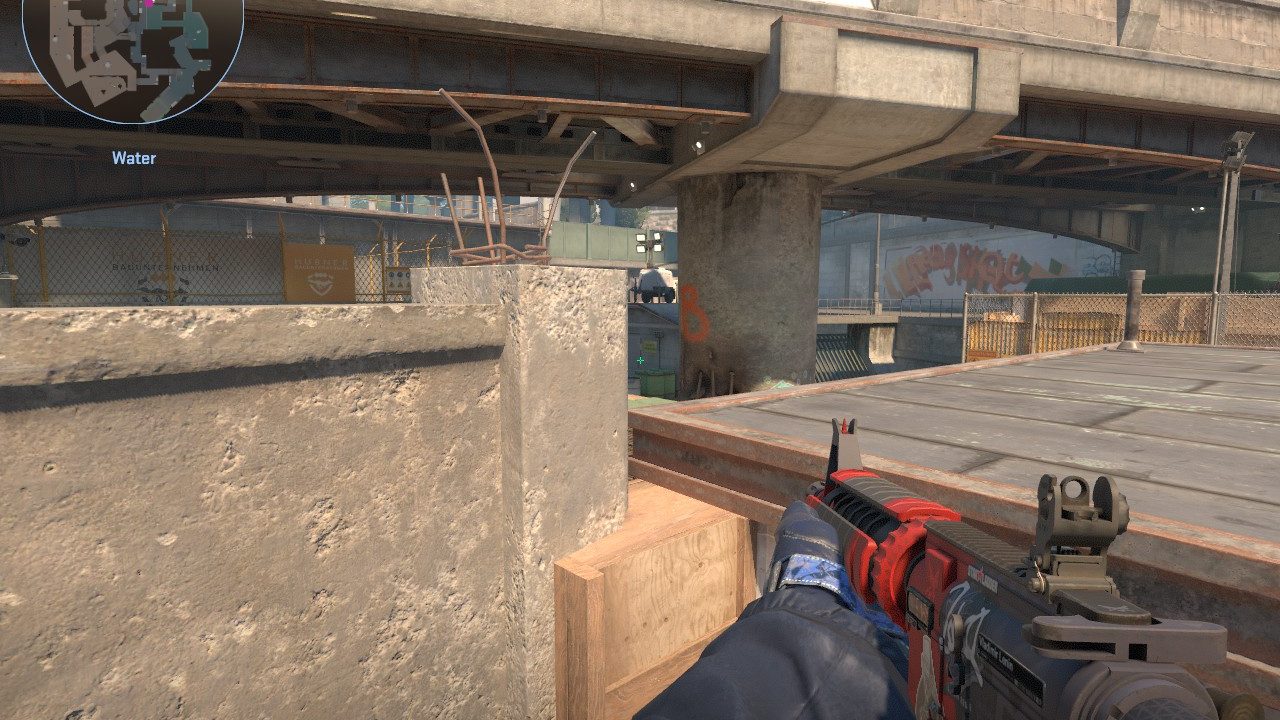
CT con stairs to short pipe Boost
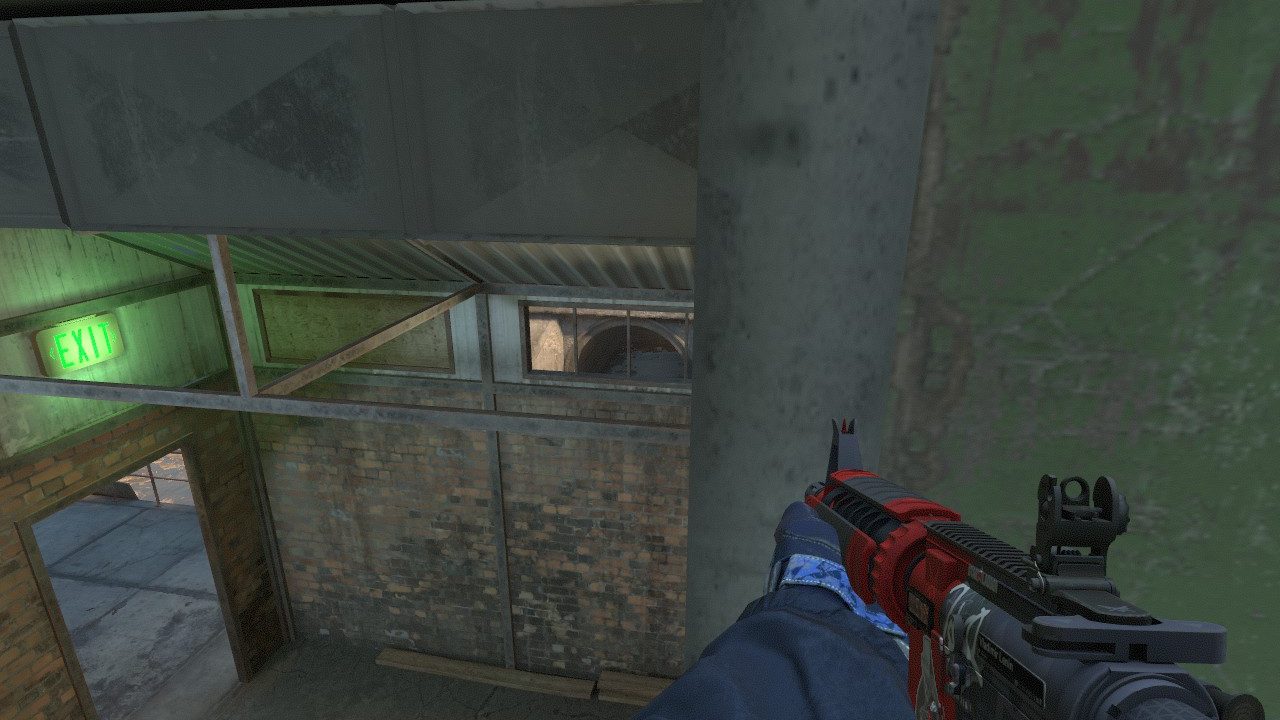
If the T’s have good utility, it can be quite difficult to fight their short take. By boosting on the connector stairs, you can spot anyone pushing out of short pipe trying to take short while being unaffected by their flashes. The boosting player should be ready to throw a smoke as a lot of players molly the connector stairs early in the round, and you don’t want to lose too much health to that. This can net you an easy opening Kill while not risking too much or using any utility.
Boost spots in CS2 offer a tactical edge that, when used judiciously, can turn the tide of a match. These positions, hidden gems within the game’s landscape, allow players to outmaneuver and outsmart their opponents with unexpected angles and vantage points. However, the key to leveraging these spots lies in their sparing use.
These boost spots will be an important part of your strategic playbook, but not the entirety of it. Experiment, adapt, and use these tactical advantages to create memorable plays and secure victories. The power of a well-timed boost, combined with team coordination and strategic foresight, can make all the difference on Overpass.
Recommended Posts
 simba
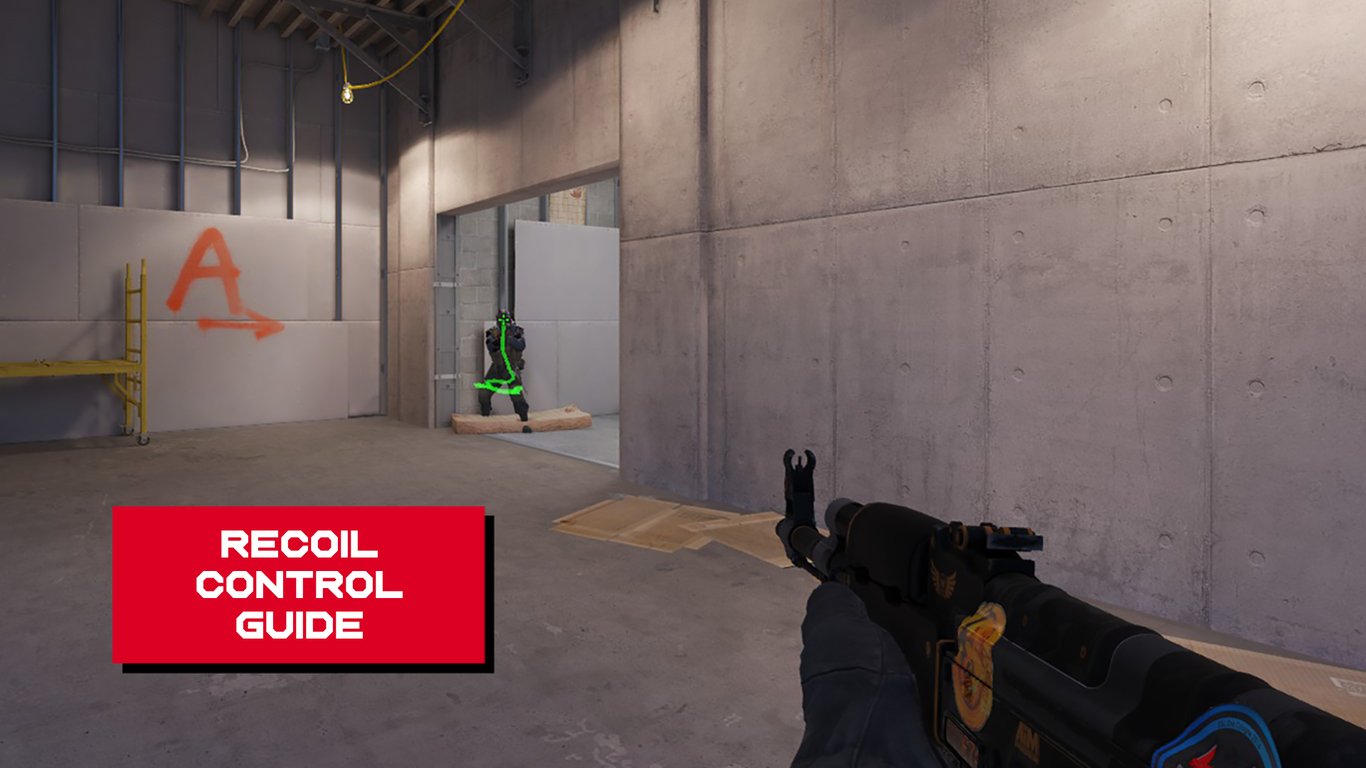
simbaRecoil Control in Counter-Strike 2: A Complete Guide
 clegur


