 Refrag
The Ultimate CS2 FPS Optimization Guide

Counter-Strike 2 is a game where every frame matters. The responsiveness of your PC can be the difference between landing that headshot and not, so when milliseconds matter this much, optimizing your PC is paramount. In this guide, we’ll be covering how to optimize your Windows install for CS2.
This guide was created by FPSHeaven (known as @fREQUENCYcs), who is renowned in the CS community for his prowess in PC optimization. He has worked with many top professionals in the scene and is a trustworthy figure in the space.
Disclaimer: Use this guide at your own risk. Performance gains may vary.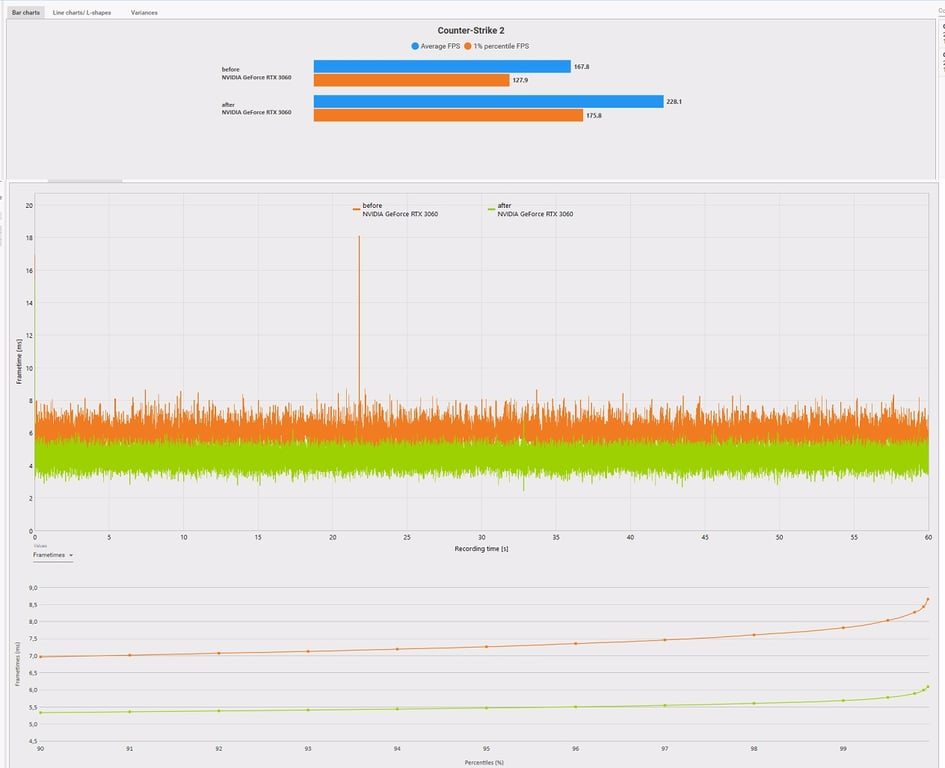
Before you start:
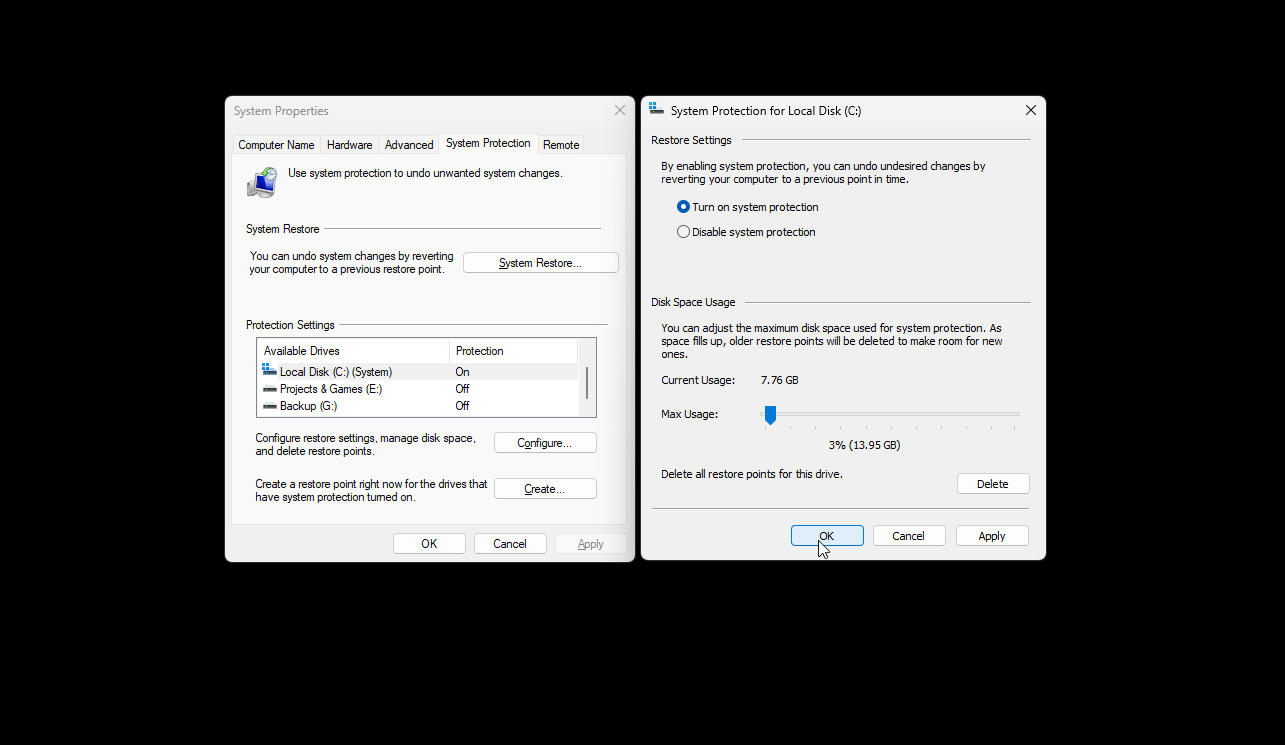
Before we jump in, it’s important that you create a system restore point. This ensures that in the event that something goes wrong during the configuration, you can restore your system to its original state. Don’t worry, nothing that we’re doing today is irreversible.
Creating a restore point
- Search “restore point” in your Windows Search bar
- Click Create a restore point
- Select your
Cdrive then click Configure in the bottom right - Select Turn on system protection, then slide the bar to 10GB then click Apply and OK
- Click Create and set a name for the Restore point in the box, then click Create
- Click
Okthen restart your PC
Getting Started
First, we want to make sure your Windows is up to date.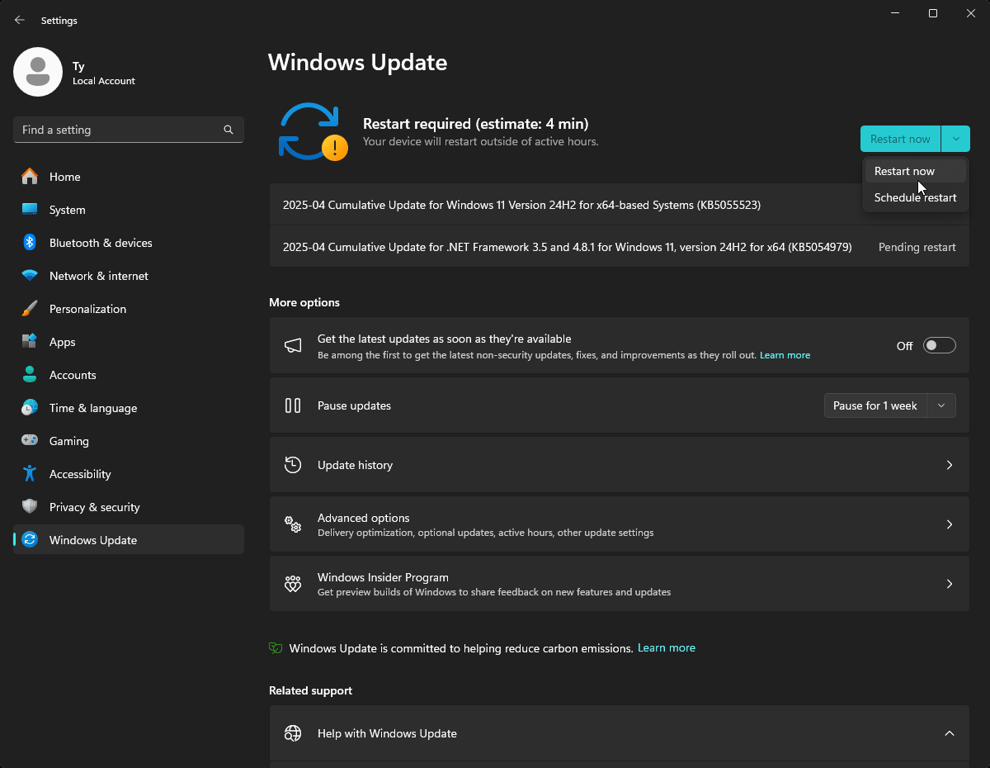
- Search for “Check for Updates” in your Windows Search
- The updates could take a minute, please be patient for the installation to process.
- Once the updates are downloaded and installed, restart your PC.
Next, lets clean up your PC a bit.
- Download and install Malwarebytes (Free and very popular anti-malware solution)
- Click the Scan button after installation is complete.
- The scan can take up to 30 minutes depending on the speed of your PC and the amount of files on your PC that need to be scanned.
- Once complete you will either see you have no threats and you can move on, or you have Threat Scan results
- Click Quarantine if you have items in your Threat Scan results
- Restart your PC.
Next, we’re going to be blocking Windows Updates. This will stop your computer from overwriting some of the changes we make.
NOTE: By disabling Windows Updates, you will be also forgoing security updates, leaving your computer vulnerable to potential threats. Proceed at your own risk.
- Download Windows Update Blocker
- Move the file to your C drive.
- Click the check box to Disable Updates and Protect Services Settings (NOTE: This will block traffic from the Windows Store. If you need to use it, you’ll need to enable updates by unchecking the Disable Updates box.)
Custom Windows Power Plan
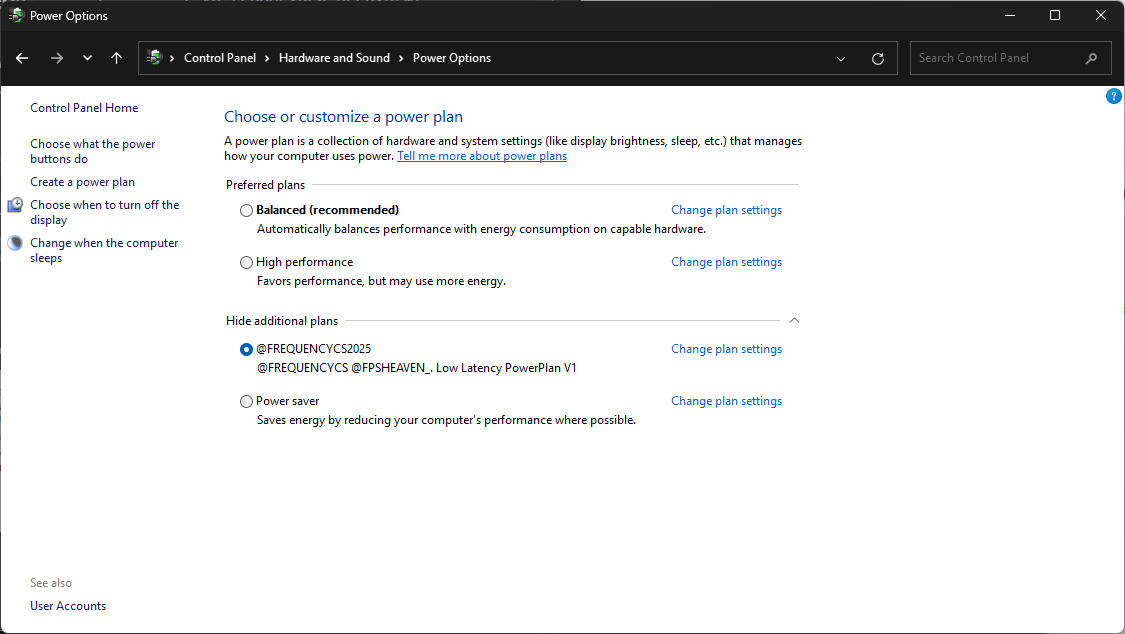
Next, we’re going to enable a custom power plan on your PC to unlock some extra performance. This power plan will adjust things like CPU power management, disk timeouts, and other settings that enable every last bit of responsiveness and framerate. We’ll also be disabling a power saving feature called Dynamic Tick.
Note: If you begin to have issues after disabling dynamic tick, you can revert the setting by opening Command Prompt as admin and typing bcdedit /set disabledynamictick no
- Create a folder on your C:\ drive and name it FPSHEAVEN_REFRAG
- Download the Refrag.gg x @frequencycs custom power plan and unzip the files in the newly created folder
- Open Command Prompt, and enter the following command:
powercfg -import “C:\FPSHEAVEN_REFRAG\@frequencycs x refrag.gg.pow" - Enter
powercfg.cpl - In the newly opened window, select the FREQUENCYCS2025 power plan.
- Reboot your PC
Windows Cleaning
Next, we’re just going to clean up your Windows install by removing temporary files and running disk cleanup.
Delete temp files
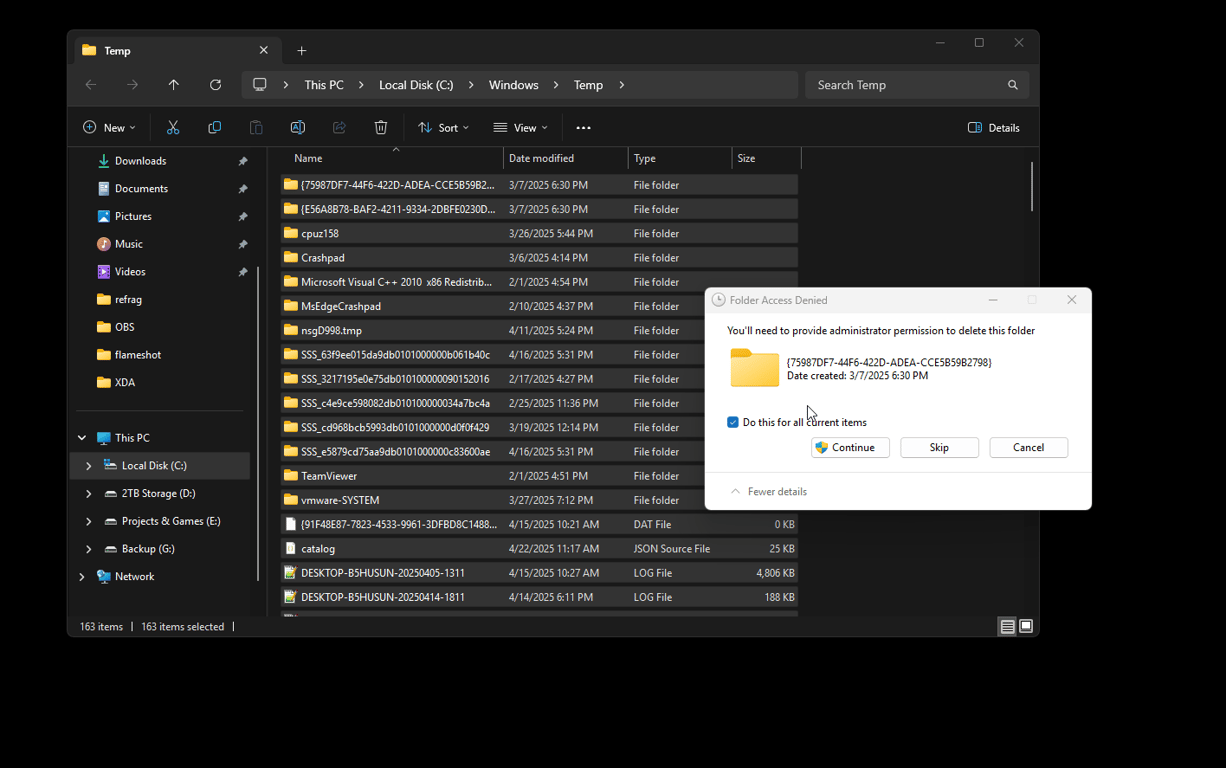
- Press Windows key + R on your keyboard to open Run
- Enter
C:\Windows\Tempand clickOK - Select all the files in the folder by pressing CTRL+A on your keyboard after selecting a random file.
- Press your Delete key.
- Tick the Do this for all current items box and click Skip
- Repeat the process for the AppData Temp folder by entering
%temp%into Run
Some items may not delete, this is fine, you can proceed to the next step.
Disk Cleanup
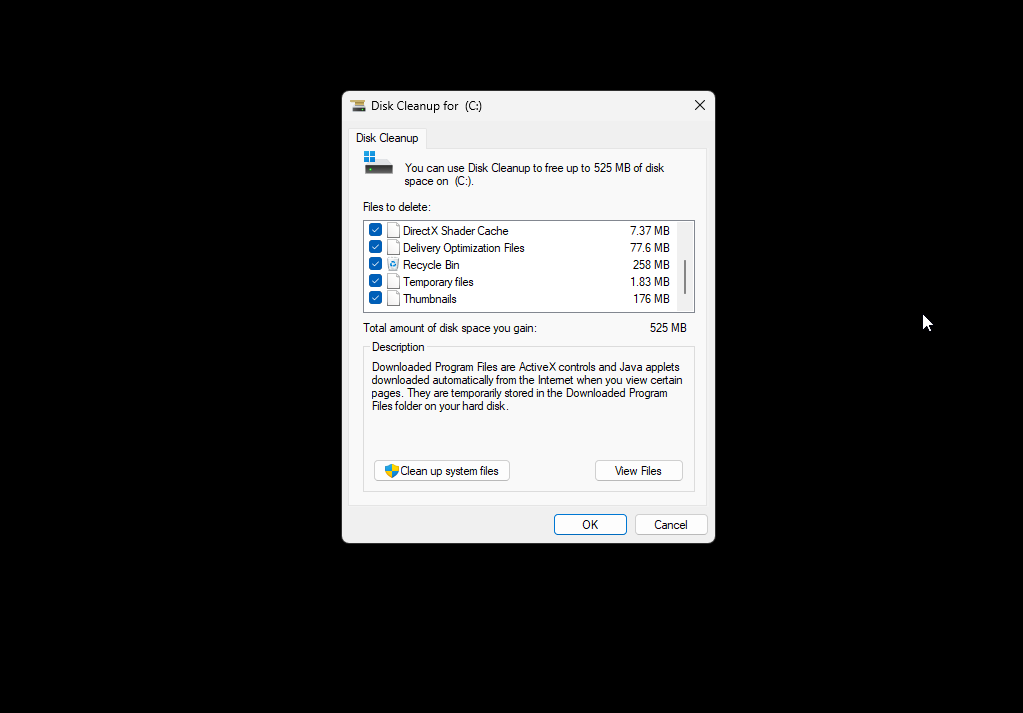
- Press Windows key + R on your keyboard to open Run
- Paste
C:\Windows\System32\cleanmgr.execlickOK - Select
C:\ drive and click OK - Tick every box and click OK and then click Delete Files
Cleaning system files
- Press Windows key + R on your keyboard to open Run
- Paste
C:\Windows\System32\cleanmgr.exein and clickOK - Click Clean up system files
- Choose what you want to clean, most people do everything
- Click
OKthis process might take a bit longer, be patient
Disabling Startup processes
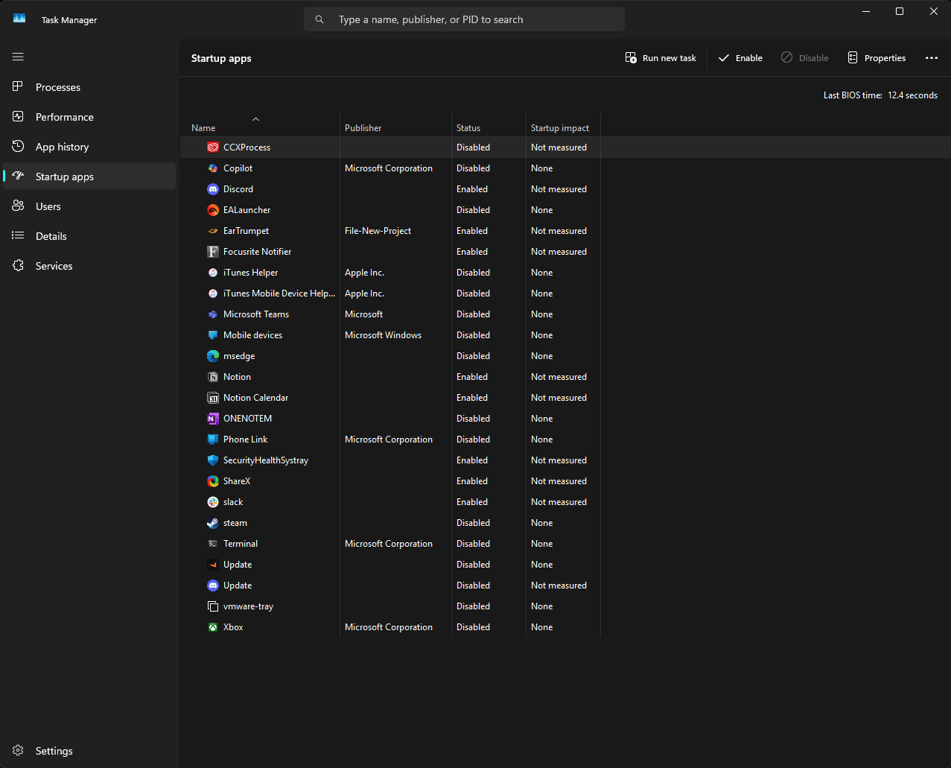
- Press
CTRL+SHIFT+ESCto open Task Manger - Select
Startuptab - Right-click on the programs you don’t want running on bootup, and click “Disable”
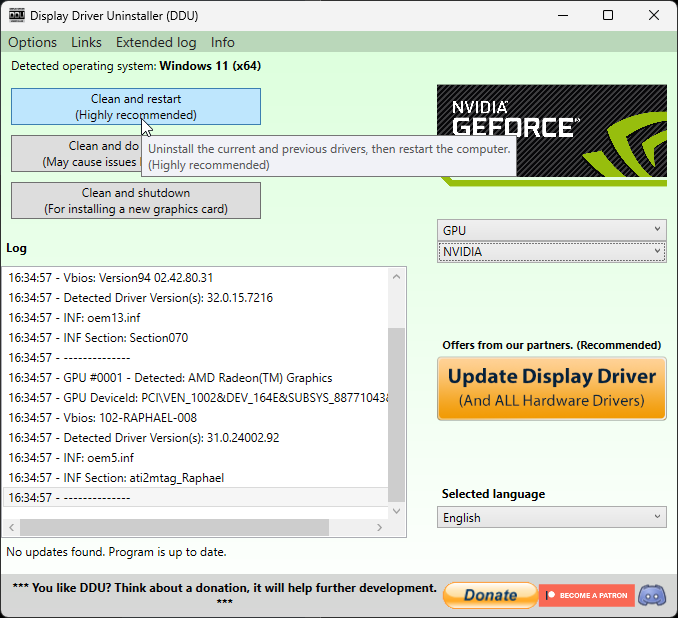
Clean GPU Driver Install
- Download DDU (Display Driver Uninstaller).
- Open the exe
- In the drop down on the right, Select your device type pick GPU
- Choose if you have NVIDIA, AMD, or Intel GPU
- Then click Clean and restart
- You system will restart one time.
Note: DDU can sometimes cause a black screen on reboot. If you have this issue, you must use some kind of Windows Installation Media like a USB stick to boot into to to repair your default Windows graphics driver.
Next, we’re going to install new GPU drivers using a utility called NVCleanInstall. If you have an AMD or Intel GPU, simply install the latest Radeon or Arc drivers respectively, and skip this step, along with the Profile Inspector step.
- Download and install NVCLEANINSTALL (Lets you customize and install the Nvidia driver package)
- Open the program and select Manually select a driver version
- Select the latest driver and make sure it says
64 bit Desktop - If you are on a laptop, select
64 bit Notebook. - Click
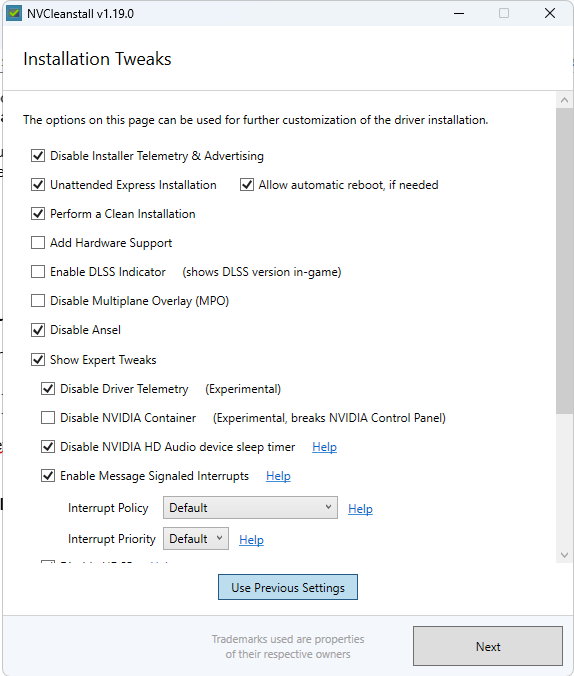
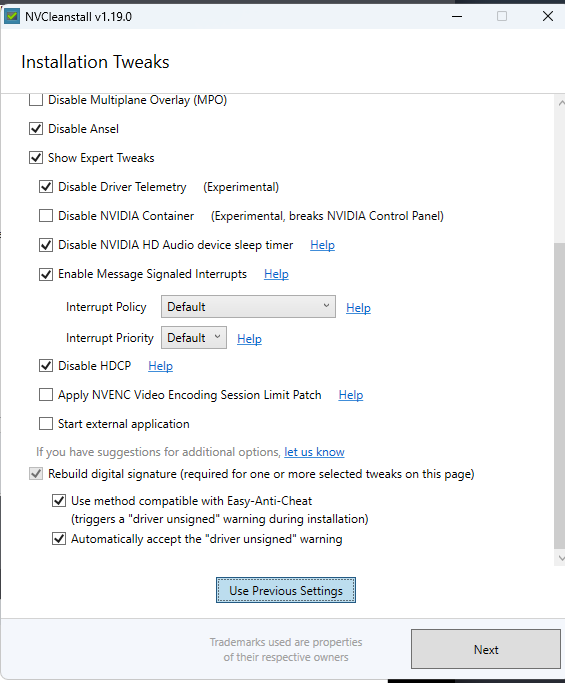
Nextand do not tick any options and then clickNextagain - Copy the settings you see below on the Installation Tweaks screen then click
Next
Click Next and then Install and wait for the installation to complete. Ignore any errors and reboot your PC. If you have issues with the latest driver revision, complete the DDU process again and install the previous driver revision using the same settings in NVCleaninstall
NVIDIA Profile Inspector
- Download and extract NVIDIA Profile Inspector (software to tweak NVIDIA drivers) to a folder you can find.
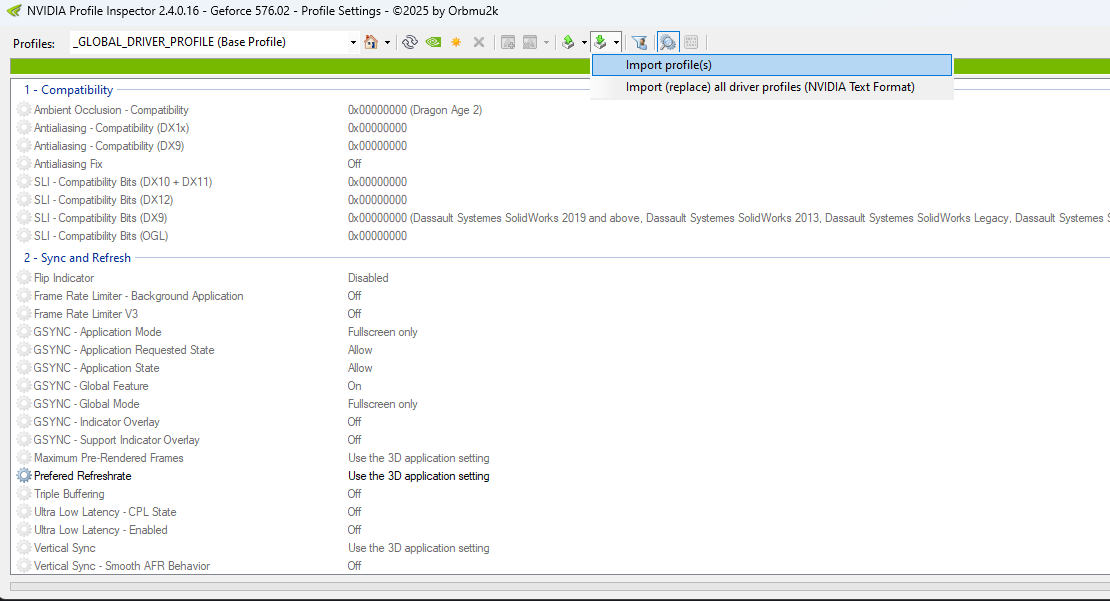
- Open
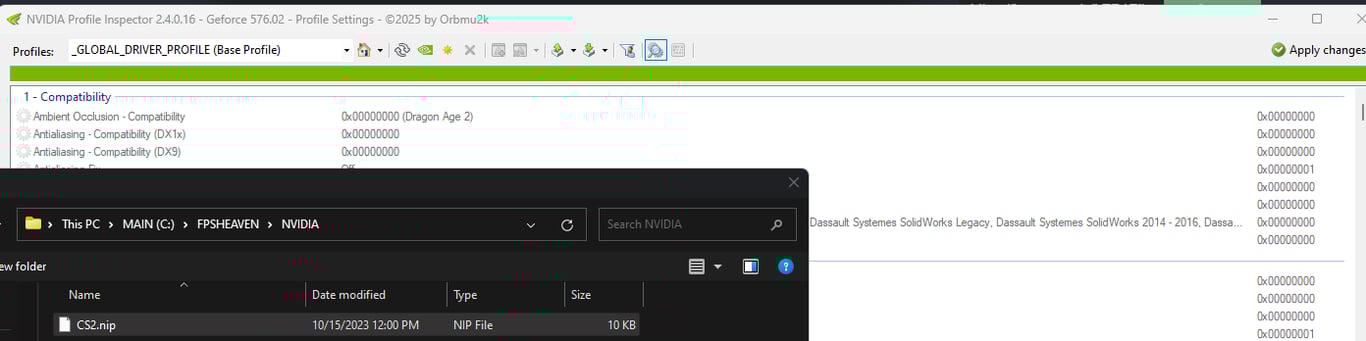
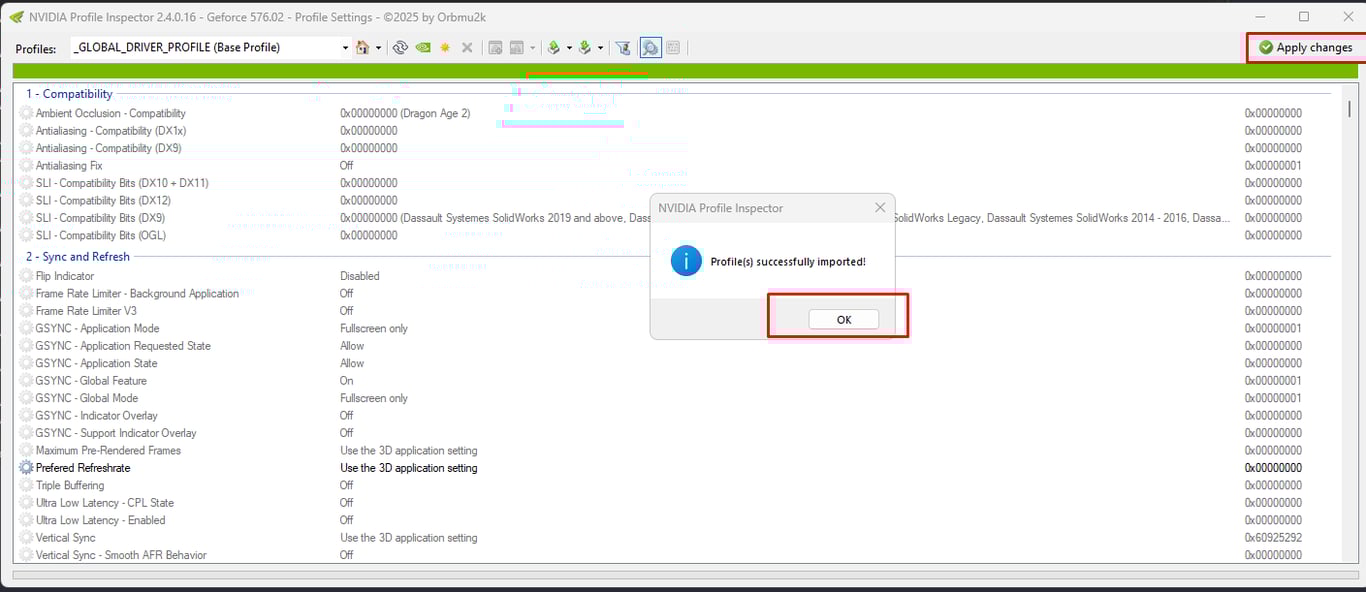
nvidiaProfileInspectorand click on the button pointing at Import Profiles(s) - Find and select the
CS2.NIPfile we downloaded in the custom power plan step (this file has no relation to NIP the CS2 org). - You will see Profiles successfully imported popup.
- Then click Apply Changes top right.
- This profile has settings specific for CS2.
- DO NOT change anything in the 3D section of NVIDIA. This will revert what we just did.
FPS Cap
In this next step, we’ll be implementing an FPS cap, which will significantly improve your frame times, and 0.1%, and 1% lows. In practice, this leaves your game feeling smoother than it otherwise would be with unlocked FPS. To do this, we’ll be using the integrated NVIDIA driver FPS cap
- Open the NVIDIA Control Panel and navigate to Manage 3D Settings.
- Click on Program Settings.
- Find CS2 in the drop-down menu and select it. If you cannot find it, click Add and locate the CS2.exe executable from the Steam directory. It is normally located at:
C:\Program Files (x86)\Steam\steamapps\common\Counter-Strike Global Offensive\game\bin\win64\cs2.exe - Scroll down and locate Max Frame Rate, then select a value.
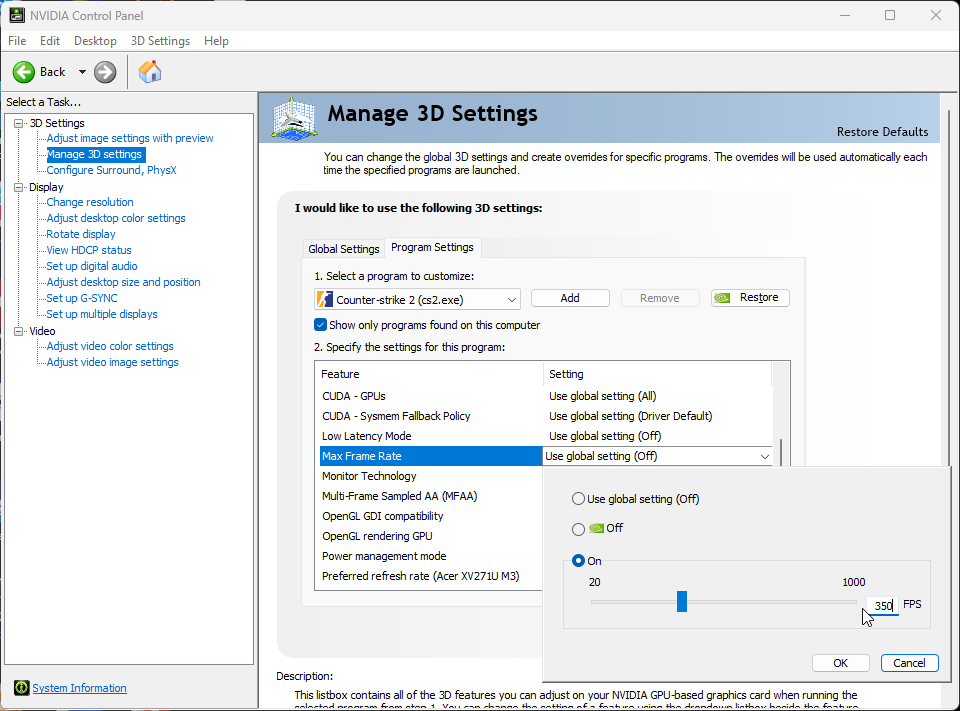
Finding this value is relatively easy. Queue up for a competitive match and take note of your average framerate. Pick a value slightly below your average framerate, so for example, if you average 280 FPS, lock the framerate to 250 FPS. Take note of your new average FPS. This can take some trial and error, so if you’re not happy with how things feel, increase/decrease the cap by 10 FPS at a time to try and dial it in.
CS2 Launch Options
It’s best to keep launch options relatively simple for CS2. Less is more, so remove everything you currently have and put the following:
-noreflex -allow_third_party_software -threads X
-noreflex – Provides smoother frametimes and slightly higher 1% lows
-allow_third_party_software – Allows compatibility with OBS and other third-party applications.
-threads X – Sets the thread count for the game. This should usually be set to the number of physical cores you have, plus 1. For Intel processors, if you have a 12900K, 13900K, or 14900K, set -threads 9 because these CPUs have 8 physical cores (ignore E-cores). If you have an AMD processor, the same applies. For example, the 7800X3D has 8 physical cores, so use -threads 9. The performance impact of this is more noticeable on Intel CPUs, but your mileage may vary.
Now that your rig is all optimized, you can try Refrag for free with code optimize1000. With this 3 day trial, you can experience what Refrag has to offer with no strings attached.
Too much work?
Hire FPSHeaven to do this all for you! If you would like a complete optimization of your PC done for you, you can use code REFRAG for 15% OFF of the Premium Package at fpsheaven.com/services.
Recommended Posts
 simba
simbaReach New Heights and Dominate with These Vertigo Boosts
 simba
simba


