Counter-Strike is a game where the proper settings are essential. Customizing your experience has always been part of CS, and nobody wants to hop into a game and discover that your preferred settings have been overwritten.
Valve has saved game settings in the Steam Cloud for quite some time now, but sometimes they don’t properly transfer over, especially in the case of specific binds or tweaks that can only be accomplished through console commands.
Having what’s called an “autoexec config” can solve this problem. A config file stores your desired settings, and this file can be automatically executed upon booting up the game, hence the name “autoexec.” In this blog post, we’ll discuss how to create your own CS2 autoexec and what commands you might put in there.
Creating a config file
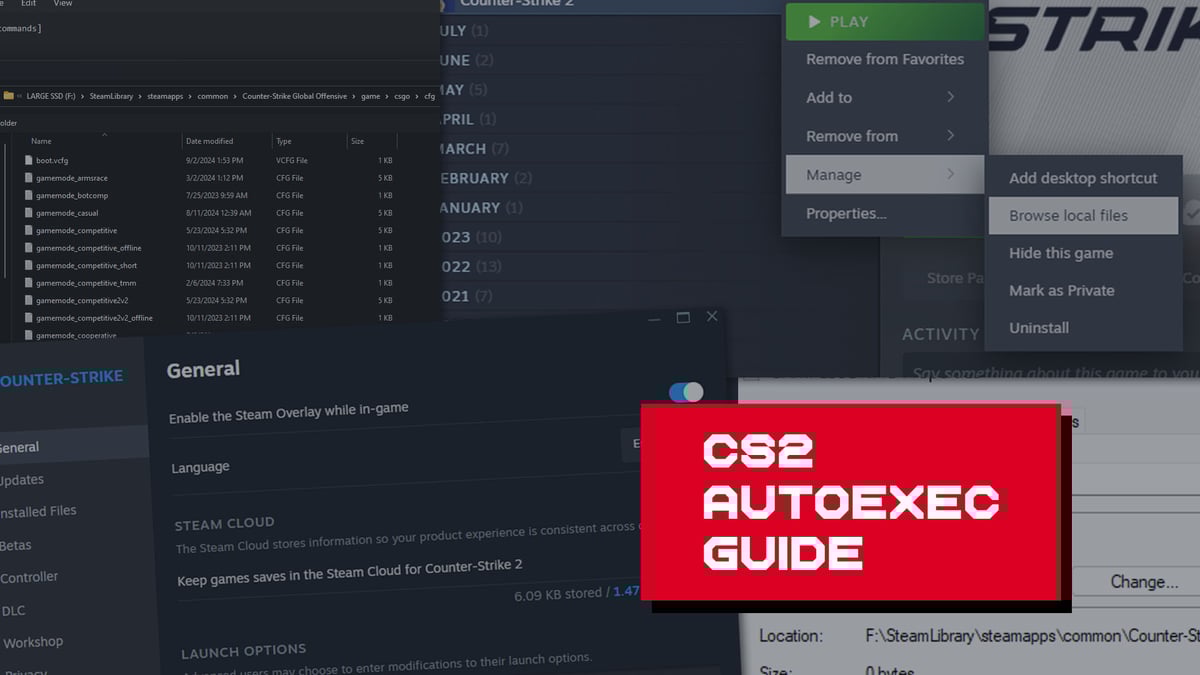
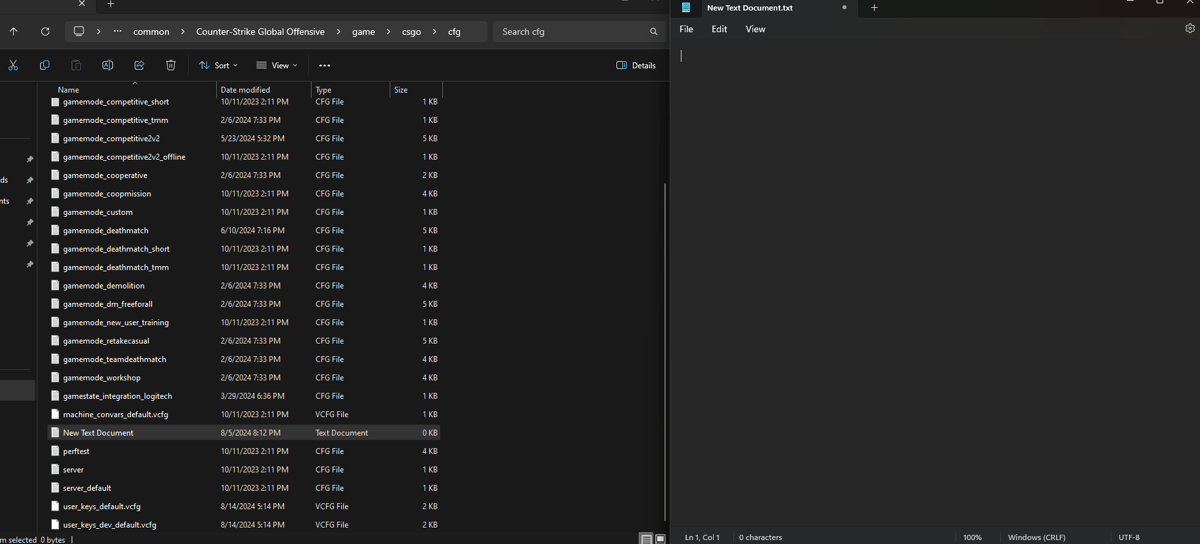
To create a config file, navigate to your CS2 install folder, and find the cfg folder. Most users can do this by opening it within file explorer with the following path:
C:\Program Files (x86)\Steam\steamapps\common\Counter-Strike Global Offensive\game\csgo\cfg
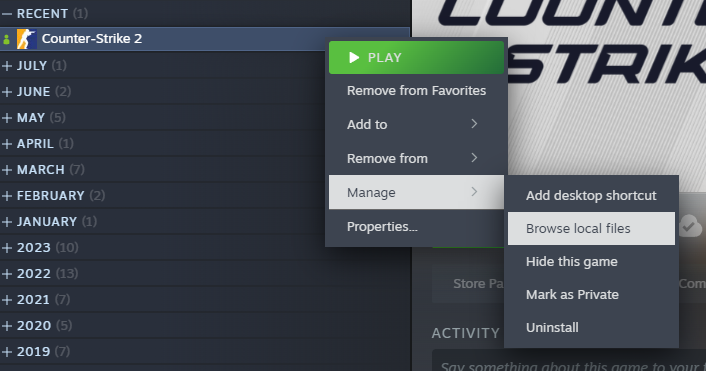
Alternatively, if your CS2 installation is stored elsewhere, you can find it by right-clicking Counter-Strike 2 in your Steam library and going to Manage>Browse Local Files and finding the folder within \game\csgo\cfg
Create a text file in this folder, and name it as desired.
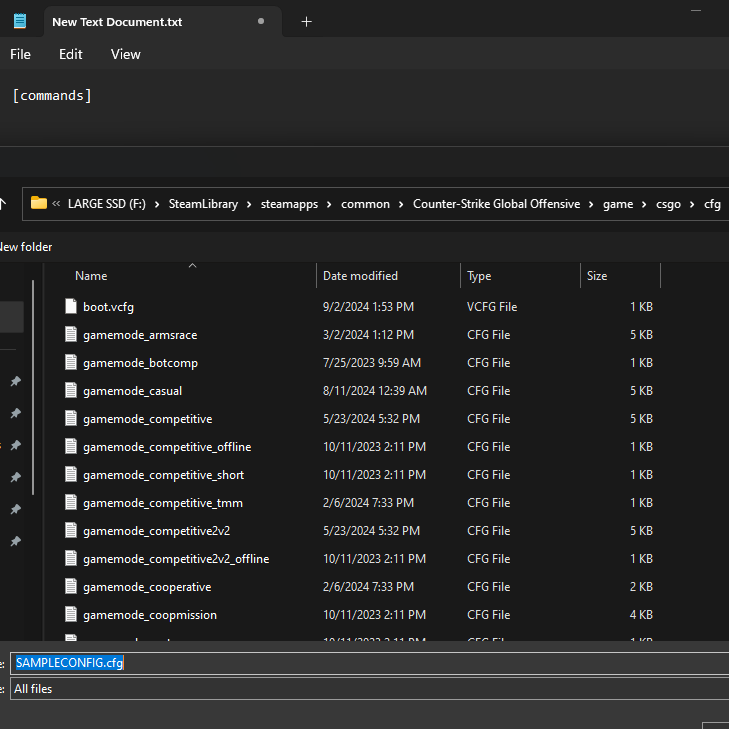
In this text document, write whichever commands you desire.
Commands for an autoexec
You can place commands of all types into an autoexec config file. These can be crosshair settings, control binds, radar/HUD settings, and even binds to execute other config files.
To create your own bind, type bind [key] "[action]" into your config file, replacing the [key] with your input of choice and [action] with your desired command.
Here are a few other commands you might be interested in placing in your config file.
cl_showfps [1, 2, 3] – This command will toggle a frames per second counter on the screen, as well as the current map name. There are 3 variations of this command. Setting it to 1 will only show you your current FPS. 2 will show more information, including average frame times, and 3 will give even more information. The second and third settings should only be used for debugging and performance monitoring.
cq_netgraph [0, 1] – This command will show network performance information as well as frames per second. For those who played CS:GO, this is CS2’s net_graph. This setting can be better configured through the in-game settings, allowing you to set it to only appear when there are performance issues.
sensitivity – This command controls how sensitive your mouse is.
cl_crosshairstyle [2, 4, 5] – This command changes your crosshair style. Currently, only 3 are implemented in CS2. Style 4 is a Static crosshair, and styles 2 and 5 are different versions of a Dynamic crosshair that changes as you move and shoot.
cl_crosshairsize – This command will adjust how long the lines on your crosshair are.
cl_crosshairthickness – This command will adjust how thick the lines of your crosshair are.
cl_crosshairgap – This command adjusts how wide the gap of your crosshair is.
cl_crosshair_drawoutline [0, 1] – When set to 1, this command will draw a black outline around your crosshair.
cl_crosshair_outlinethickness [0-3] – This command adjusts the thickness of the outline around your crosshair when it’s toggled on.
cl_crosshaircolor [1, 2, 3, 4, 5] – This command will change your crosshair color based on set color combinations made by Valve. This can also be adjusted using per color commands, which will adjust the specific RGB values of your crosshair, such as cl_crosshaircolor_r, cl_crosshaircolor_b, and cl_crosshaircolor_g. Values for those commands range between 0 and 255.
viewmodel_fov – Adjusts the field of view for your weapon viewmodel.
viewmodel_offset_x – Adjusts the X axis value for your weapon viewmodel.
viewmodel_offset_y – Adjusts the Y axis value for your weapon viewmodel.
viewmodel_offset_z – Adjusts the Z axis value for your weapon viewmodel.
viewmodel_preset_pos [1, 3] – This command changes which viewmodel preset you’re currently using. These presets have their own x, y, and z values.
Once finished entering in any desired commands, click File>Save as in your text editor and be sure to change the file extension from .txt to .cfg, and under the dropdown that reads “Save as type,” change it to All files.
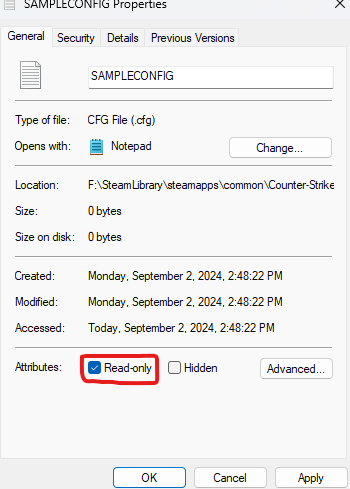
Once saved, right-click your new config file and click Properties. Under “Attributes:” check the “Read-only” checkbox, then click Apply.
Now, to ensure CS2 boots up using your newly created config, we need to add a custom launch option. To do this, navigate to CS2 in your Steam Library, right-click and select “Properties”
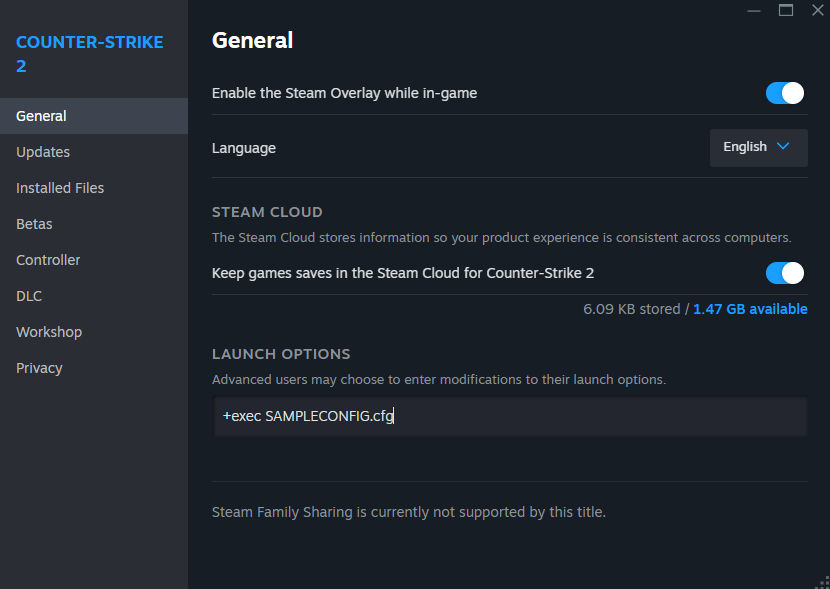
Under “LAUNCH OPTIONS,” enter +exec [name of file].cfg, replacing “name of file” with the name chosen for your config file. When that’s done, you’ve successfully created an autoexec config file for CS2.